Abstract swirls are the perfect beginner-friendly nail art. Learn how to steady your hand and pull clean, fluid lines using long striping brushes.
I'll be honest with you — when I first started doing abstract swirl nail art on my clients, I made a royal mess. Blotchy lines, wobbly curves, gel pooling in places it shouldn't be. But here's what I love about this design: once you understand the technique, it's one of the most forgiving and stunning nail art styles out there. There's no "wrong" way to swirl, which makes it an absolute dream for both beginners and experienced techs looking for something trendy.
I've spent years refining my approach to abstract gel nails, and in this abstract swirl nail art tutorial, I'm breaking down everything I know. We're talking brush selection, hand positioning, gel consistency, and the little tricks that took me forever to figure out on my own. Let's get into it.
Why Abstract Swirl Nail Art Is So Popular Right Now
Swirl nails have been everywhere — on Instagram, in salons, on runways. And I get it. They're elegant without being fussy, modern without being over-the-top. The style works with virtually any color palette, from muted neutrals to bold neons, and it suits every nail shape and length.
What I really appreciate about this trend is that it doesn't demand perfection. Unlike geometric nail art or detailed floral designs, abstract swirls embrace organic, free-flowing movement. A slightly wobbly line? That's just part of the aesthetic. But that doesn't mean there aren't techniques you should master to make your swirls look intentionally artistic rather than accidentally messy.
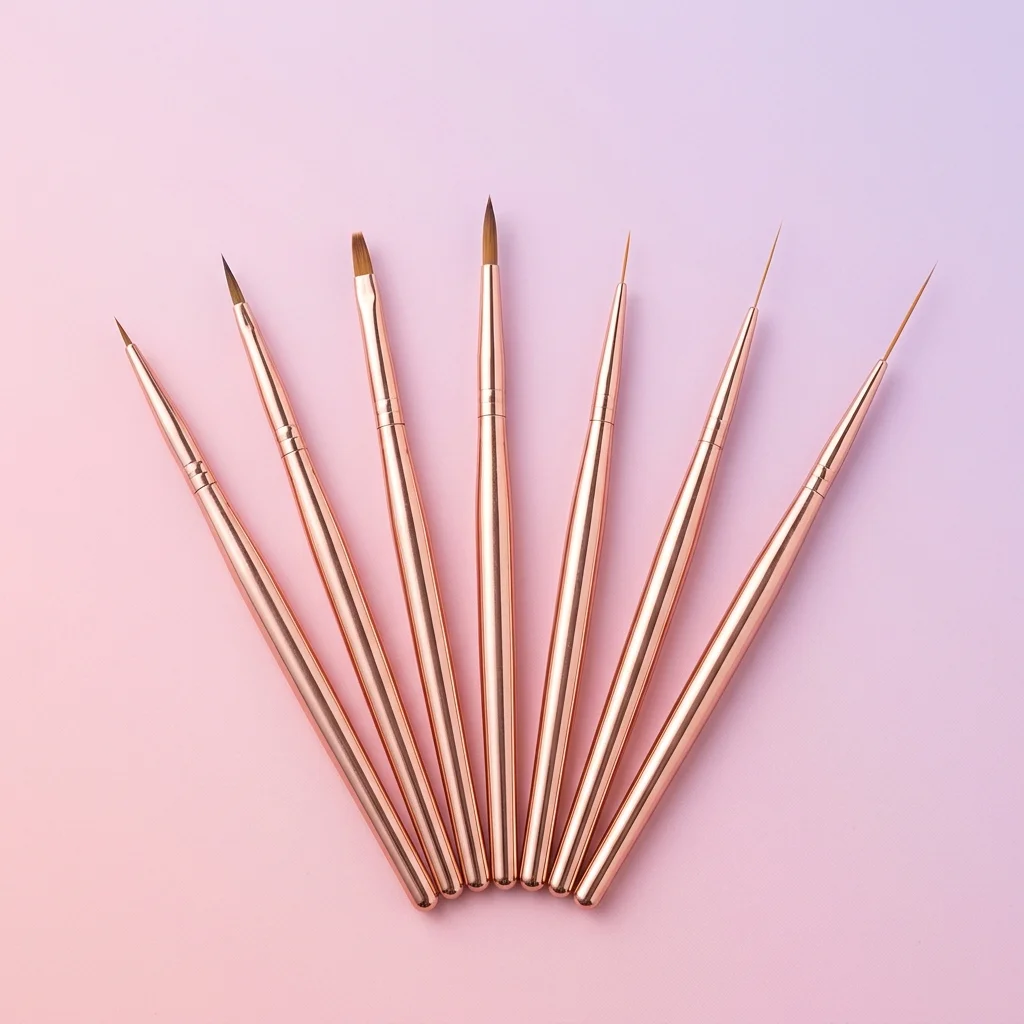
Choosing the Right Line Drawing Nail Brushes
This is where most people go wrong right out of the gate. Not all brushes are created equal, and picking the wrong one will fight you the entire time. Trust me — I've wasted money on brushes that looked great in the package and performed terribly on the nail.
Striping Brushes
Your number one tool for abstract swirl nail art is a long striping brush. These brushes have thin, elongated bristles — usually between 7mm and 15mm in length — that hold a consistent line of product and allow you to pull long, fluid strokes without reloading.
Here's what I look for in a quality striping brush:
- Bristle length of at least 10mm — shorter brushes force you to reload too often, breaking the flow of your line
- Firm but flexible tip — too stiff and you'll get scratchy lines; too floppy and you'll have zero control
- Natural or high-quality synthetic fibers — cheap synthetics tend to splay and lose their shape after a few uses
- Comfortable, lightweight handle — you'll be holding this brush for extended periods during detailed work
Liner Brushes for Fine Details
For those tiny accent lines and delicate detail work within your swirls, I keep a fine liner brush on hand. These are shorter than striping brushes — around 5mm to 7mm — and give you more precision for tight curves and small overlapping lines.
A Quick Note on Brush Care
I can't stress this enough: clean your brushes thoroughly between colors and after every service. Dried gel in the ferrule will ruin a good brush faster than anything else. I use a gentle brush cleanser and reshape the bristles after every use. Your line drawing nail brushes are an investment — treat them that way.
Prepping the Nail for Abstract Gel Nails
Before you even think about picking up a brush, your base work needs to be solid. Here's my prep routine:
- Proper nail prep — Push back cuticles, remove shine from the natural nail, cleanse with a dehydrator and primer as usual.
- Apply your base coat — Cure fully per manufacturer instructions.
- Apply your base color — For abstract swirls, I usually go with a solid, opaque color. Two thin coats, fully cured. White, cream, nude, and pastels are gorgeous bases. Dark colors like black or navy also make swirl lines pop dramatically.
- Apply a no-wipe top coat and cure — This is my secret step. A no-wipe top coat creates a smooth, non-tacky surface that lets your swirl lines glide on effortlessly. If you work on a tacky inhibition layer, your brush will drag and the gel won't flow cleanly.
The Actual Abstract Swirl Nail Art Tutorial: Step by Step
Alright, here's the part you've been waiting for. Let me walk you through how I actually paint the swirls.
Step 1: Load Your Brush Correctly
Dip your striping brush into your gel color and wipe off any excess on the back of your hand or a palette. You want a thin, even amount of product — not a big glob. Too much gel on the brush is the number one cause of thick, blobby lines. The gel should coat the bristles evenly from ferrule to tip without dripping.
Step 2: Anchor Your Hand
This changed everything for me. Before I learned proper hand positioning, my lines were all over the place. Here's what works:
- Rest the side of your palm or your pinky finger on the client's finger or on the table surface
- Hold the brush like a pencil, about halfway up the handle — not too close to the bristles and not at the very end
- Move from your arm and shoulder, not your wrist or fingers. Small wrist movements lead to shaky, inconsistent lines
- Rotate the client's finger rather than contorting your own hand into weird angles
Step 3: Pull Your First Line
Start with a single flowing curve. Place the tip of the brush on the nail, apply gentle and even pressure, and pull the brush toward you (or across the nail, depending on the direction of your design). Move at a steady, moderate pace — too fast and the line gets thin and breaks up; too slow and the gel pools and spreads.
Here's my golden rule: commit to the stroke. Hesitation is your enemy. Even if the line isn't exactly where you planned, a confident stroke always looks better than a tentative one.
Step 4: Build Your Swirl Pattern
Now comes the fun part. From your first line, start building out the swirl:
- Add a second curved line that follows or echoes the first, leaving a small gap between them
- Vary the thickness by adjusting your pressure — press down gently for thicker sections, lighten up for thinner areas
- Create S-curves, spirals, and loose, flowing shapes that overlap and weave
- Don't overthink the placement. Abstract means abstract — let the design breathe and flow naturally
For a more dynamic look, I like to use two or three complementary colors. I'll do the primary swirl in one color, then add thinner accent lines in a second shade that trace alongside or cross over the first.
Step 5: Cure and Layer
Once you're happy with a section of swirl work, cure it before adding more detail on top. This prevents smearing and lets you build dimension. I typically do my swirls in two to three layers:
- First layer: Main swirl lines — cure
- Second layer: Accent lines and overlapping details — cure
- Third layer: Any fine details, dots, or thin highlights — cure
Step 6: Seal Everything
Apply a generous coat of gel top coat over the entire nail. Make sure you cap the free edge. Cure fully, and you're done.
Color Combbinations That Work Beautifully
Over the years, I've found certain color pairings that clients absolutely love for abstract gel nails:
- White base with black and gold swirl lines — Clean, modern, editorial
- Nude base with soft pink and terracotta swirls — Warm and wearable every day
- Light blue base with navy and white lines — Fresh and coastal
- Black base with neon green or electric blue swirls — Bold and statement-making
- Cream base with sage green and dusty rose — Earthy and trendy
- Sheer milky base with chrome swirl lines — Subtle but luxe
Troubleshooting Common Problems
Even with practice, things can go sideways. Here are the issues I see most often and how I fix them:
Lines Are Too Thick and Blobby
You've got too much product on your brush. Wipe more off before you start your stroke. Also check that your gel isn't too warm — warm gel flows more freely and can overwhelm the brush.
Lines Break Up or Skip
Your brush is too dry, or you're moving too fast. Reload with a thin, even coat of gel and slow down your pace just a little. Make sure the surface underneath is smooth — any texture or tackiness will catch the brush.
Shaky, Wobbly Lines
Anchor your hand better and move from your shoulder instead of your wrist. Also, try bracing the client's hand more securely. A wobbly canvas makes wobbly art.
The Gel Spreads After Application
Your gel might be too thin or runny, or you may be applying too much pressure. Use a slightly thicker-viscosity gel for line work, or let a thinner gel sit for a few seconds to thicken up before drawing.
Practice Tips That Actually Help
I practice new designs on nail tips glued to a swatch stick, and I recommend you do the same. Here's how I structure my practice sessions:
- Warm up with straight lines first — Pull 20 to 30 straight lines before attempting curves
- Practice S-curves and spirals separately — Build muscle memory for each shape
- Time yourself — Not to rush, but to find a comfortable, consistent pace
- Practice on different nail shapes — Curved lines behave differently on almond nails versus square nails
- Record yourself — Watching playback reveals hand positioning issues you can't feel in the moment
Frequently Asked Questions
Can I do abstract swirl nail art with regular polish instead of gel?
You absolutely can, but gel gives you way more working time to perfect your lines before curing. Regular polish starts drying immediately, which makes detailed line work much harder. If you're using regular polish, work quickly and use a polish thinner to keep the consistency fluid.
What's the best gel consistency for swirl lines?
Medium viscosity works best. Painting gels and art gels specifically designed for line work are your best bet. They're thicker than base gels but thinner than hard gels, giving you great control without being too runny.
How long should my striping brush bristles be?
I recommend at least 10mm for smooth swirl lines. Anything shorter and you'll be reloading constantly, which interrupts the flow and creates uneven lines.
Can beginners really do abstract swirl nails?
Yes — this is one of the best nail art styles for beginners to start with. The abstract nature means imperfections actually add to the design. Start with simple, single-line swirls and work your way up to more complex layered patterns as your confidence builds.
Do I need to cure between each line?
No, not each individual line. I cure between layers — so all the main swirl lines in one color get cured together, then I add accent details on top. Curing every single line would take forever and isn't necessary as long as you're careful not to smear what you've already laid down.
How do I clean my line drawing nail brushes after using gel?
Wipe excess gel off on a lint-free pad, then use a dedicated brush cleanser or 99% isopropyl alcohol to dissolve remaining product. Reshape the bristles and store them flat or bristle-side-up. Never soak brushes in acetone for extended periods — it'll dry out and damage the bristles over time.
That's everything I've got for you on abstract swirl nail art. The real secret? Practice, patience, and the right brush. Once you've got those three things locked in, you'll be creating gorgeous, flowing designs that your clients will obsess over. Now go grab your striping brush and start swirling.