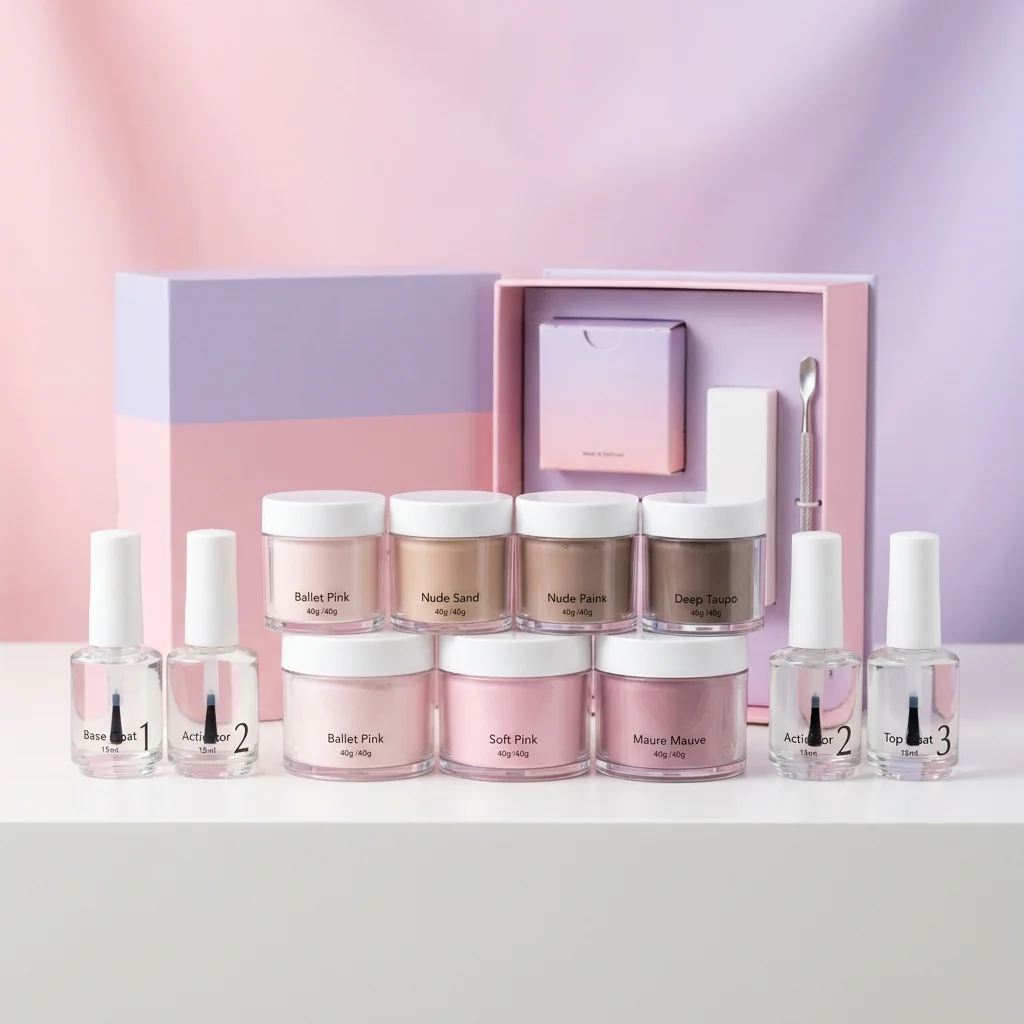
Dip powder and gel polish can both create a polished, longer-wearing manicure look at home, but they get there through different application architectures. Gel is a brush-on coating that must cure in a compatible lamp. Traditional dip is a layered powder-and-liquid system that sets through its liquids and activator rather than a lamp. Neither system is automatically better, healthier, easier, or more durable for every person. The useful choice comes down to the finish you want, how much equipment you want to own, how often you change color, and whether you are prepared for the removal and cleanup process.
This comparison focuses on standard lamp-cured gel polish and traditional air-set dip powder systems. Builder gels, hard gels, extensions, peel-off products, and hybrid kits can behave differently, so follow the instructions for the specific system rather than assuming every product in a category works the same way.
At a glance: the practical differences between dip and gel
| Priority | Gel polish | Dip powder |
|---|---|---|
| Application architecture | Brush-on base, color, and top layers that cure in stages. | Adhesive-style liquid, colored powder layers, activator, and finishing liquid or top coat. |
| Lamp requirement | Requires the curing lamp and timing specified for the product system. | Traditional systems set with liquids and do not require a lamp. |
| Work pace | Wet product stays movable until cure, allowing time for brush placement. | Liquids and powder layers require a more deliberate sequence and can set quickly. |
| Finish and feel | Often suited to thin, glossy, flexible-looking color layers. | Often creates a more structured, rigid coating; bulk depends heavily on technique. |
| Detailed nail art | Usually easier for fine lines, layered designs, and controlled placement before cure. | Well suited to powder-based color effects, but intricate brush art is less direct. |
| Color changes | Brush application makes a new design straightforward after proper removal. | A new color generally means rebuilding the powder layers after removal. |
| Removal | Usually involves reducing the coating and using the maker-directed removal process. | Usually involves reducing the bulk and using the maker-directed removal process. |
| Powder hygiene | No communal color powder is involved. | Requires careful handling so nail-contacted powder is not returned to a shared main jar. |
| Upfront equipment categories | Lamp, gel products, prep and cleanup items, tools, and removal supplies. | Powders, system liquids, tools, storage or portioning supplies, and removal supplies. |
Application architecture changes the whole experience
Gel polish is a controlled, lamp-cured coating process
A standard gel manicure generally uses a base layer, one or more color layers, and a top layer. Each layer is brushed onto the nail and cured according to the product maker's directions. The lamp is not an optional finishing step: it is part of the system that turns the applied gel layer into its intended finished coating.
The advantage of this architecture is control before cure. A person can refine a line, clean a sidewall carefully, or reposition a small detail while the product is still uncured. That makes gel particularly practical for painted French tips, thin striping, layered color work, chrome-related designs that call for a cured base, and other detail-oriented looks. It also means a gel manicure rewards a light hand. Thick layers can look bulky, pool near the skin, or complicate the cure process.
Gel requires close attention around the cuticle and sidewalls. Keep uncured gel off skin. If any uncured product reaches skin, remove it promptly before cure using the product maker's cleanup directions. Do not cure product that has flooded onto skin, and do not assume a lamp or timing intended for one gel will work as directed with a different formula.
Dip powder is a build-up process with liquids and powder
Traditional dip starts with a liquid applied to the nail, followed by contact with colored powder. The process is repeated to build coverage, then an activator and finishing steps help set and refine the coating. The exact bottle names vary by brand, but the core method is the same: the manicure is built physically through powder layers rather than painted in thin, lamp-cured color coats.
Not needing a lamp is a major practical difference. It reduces the equipment footprint and removes cure timing from the application routine. It does not make dip a casual or consequence-free process, though. The liquids still need precise placement, the powder layers need even coverage, and the surface typically needs shaping before the final finish. Working too close to skin can create cleanup problems in either system.
Dip can be especially appealing to someone who wants a solid color or a powder effect and prefers an air-set routine. It can be less intuitive for someone who enjoys changing direction mid-design, because the sequence of liquid, powder, activator, and filing is more structured. The application is not simply gel polish without a lamp; it is a different manicure architecture with different skills.
Lamp requirements are more than a shopping-list detail
For gel, buy and use the lamp recommended or specified by the product maker whenever possible, and follow its stated cure instructions. A lamp's design, cure timing, formula compatibility, layer thickness, and placement all matter to the intended process. Cutting cure time short, using an incompatible setup without guidance, or applying overly thick product is not a shortcut worth taking.
During curing, stop if you experience painful or significant heat or irritation. Do not push through discomfort to finish a manicure. A lamp is also a commitment to keeping a dedicated work area, managing cords and space, and setting aside enough time to cure each stage correctly.
Traditional dip does not use a curing lamp, but some kits sold alongside dip products may include gel-style top coats or hybrid components. Read the bottle instructions rather than relying on a kit name. If a particular product says it requires a lamp, treat it as a lamp-required product even if the rest of the manicure is dip-based.
Learning curve: gel asks for brush discipline; dip asks for sequence discipline
Beginners sometimes hear that dip is easier because it does not need a lamp, while others find gel simpler because it is familiar to anyone who has used regular polish. Both impressions can be true. The better question is which type of mistake you would rather learn to manage.
With gel, the recurring beginner challenges are thin, even application; avoiding cuticle flooding; preventing streaks; and curing every coat as directed. The product stays workable before cure, which can be helpful, but that extra time can also invite over-brushing. Gel is generally easier to use for hand-painted details because the design can be placed with a brush and cured when it looks right.
With dip, the recurring challenges are controlling the amount of liquid, getting even powder coverage, keeping the apex and side profile from becoming bulky, and filing without removing more natural nail than intended. The powder process can make it easier to build a more substantial coating, but substantial is not the same as automatically well-shaped. A thin, balanced dip set takes practice.
For either system, start with simple color before adding extensions, heavy embellishments, or complicated art. Learn how your chosen products behave on a few nails, keep the application area organized, and leave enough time for removal rather than treating it as an afterthought.
Thickness, shine, flexibility, and art are not identical priorities
Standard gel polish is often chosen for a sleek, glossy appearance because color and top coat can be applied in thin layers. The finished feel can be comparatively flexible, depending on the formula and the natural nail underneath. A high-shine gel top coat can look very polished, but shine still depends on proper application, an even cure, and the top coat itself.
Dip powder is commonly used when someone wants a more structured coating. Its layered construction can feel more rigid than a standard gel polish manicure. That does not mean every dip manicure must look thick or that every gel manicure must look thin. Layer count, powder application, filing, top coat, nail length, and product choice all affect the final profile.
For color effects, dip has strengths of its own. Powder gradients, glitter layers, and opaque solid colors are natural fits for the system. Gel is usually the more direct option for fine florals, tiny graphics, crisp lines, and multistep art because the brush is the primary application tool and the artist can cure one completed stage at a time.
Removal is where both systems demand patience
Neither gel nor dip should be peeled, picked, pried, or aggressively scraped from the nail. Those methods can remove layers from the natural nail along with the coating. Removal is a planned part of ownership, not a failure of the manicure.
Both systems commonly involve reducing the finished coating first and then using the removal method stated by the manufacturer. Acetone-containing removers are common in at-home nail removal, but formulas and directions vary. Do not assume one solvent, timing, or technique is appropriate for every gel, dip, or top coat. Follow the instructions supplied for the products you used.
Acetone exposure is worth considering in context, especially for people who change manicures frequently. It is a volatile solvent, and repeated or prolonged contact can leave nails and surrounding skin feeling dry. The practical variables are how much product must be removed, how the manufacturer directs removal, how often color is changed, and whether you handle remover carefully. This is not a reason to frame one system as healthier than the other; both can create a removal routine that involves acetone-containing products or other maker-specified removers.
If the coating is not releasing as the product directions indicate, do not force it off. Reassess the instructions and avoid turning removal into a scraping session. A person who wants frequent color changes should include removal time, supply use, and cleanup in the decision—not just the fun of choosing the next shade.
Dip powder hygiene deserves its own plan
Powder handling is a meaningful difference between these systems. When a nail enters a jar of dip powder, nail dust, moisture, and product residue can be introduced into that powder. That matters most when products are shared. A jar that has had nail contact should not function as a communal pot for multiple people.
For personal at-home use, portioning powder into a clean working container or using a pour-over approach can reduce the chance of returning nail-contacted material to the main jar. Keep the powder area away from food and drinks, minimize airborne dust, and clean the work surface after filing. Use clean, dedicated brushes and tools, and avoid letting bottle necks or applicators touch nails or skin.
Gel has a different contamination pattern: there is no colored powder pot to manage, but open bottles, brushes, and uncured product still need careful handling. Close bottles when they are not in use, keep products off skin, and avoid using an applicator that has become contaminated with dust or debris. Good organization is part of both systems, not an optional salon-style extra.
Skin-contact and ingredient boundaries matter in both systems
Dip being lamp-free does not mean it has no ingredient considerations, and gel being glossy does not mean it should touch skin. Keep all nail products where they belong: on the nail plate and applied according to their instructions. For uncured gel specifically, remove skin contact promptly before cure using product-maker cleanup directions. Use the same care with dip liquids, activators, and finishing products.
A HEMA-free label is not a no-reaction guarantee. It only describes one aspect of a stated formulation and does not mean every possible sensitizing or irritating ingredient is absent. Ingredient lists, formulas, and directions can vary by product, including within a brand. If you have previously reacted to nail products, do not treat a new formula or a HEMA-free claim as proof that it will be suitable; consider individualized guidance from a qualified clinician before trying related products.
Stop using a product if irritation develops, and do not continue an application through painful or significant heat. Avoid making a health claim for either system based solely on whether it uses a lamp, contains a particular advertised ingredient, or requires a certain removal method. Good technique and following the maker's directions are more useful boundaries than broad claims that gel or dip is universally safer.
Repairs and color changes favor different habits
Gel can be convenient for a small cosmetic correction when the surrounding coating is fully attached and the product maker's system supports the repair. A tiny area can sometimes be refined, recolored with compatible gel, and cured in stages. Do not paint over lifting product; if a section is separating, remove the affected coating according to directions instead of sealing a problem underneath another layer.
Dip repairs can be done, but blending a rebuilt powder area into the existing structure takes more shaping skill. A repair can leave a visible change in profile or color if it is not carefully feathered and finished. That does not make dip impractical; it means the system is often better suited to someone willing to rebuild a nail methodically instead of expecting a quick brush-on touch-up.
Neither system makes dramatic color changes completely effortless. Gel allows more flexible design work during application, while dip usually requires rebuilding the colored powder layers. If you like a new manicure look very often, factor in the full removal-and-reapplication process before choosing based on color range alone.
Compare costs as system categories, not just kit prices
Gel's upfront categories include a compatible lamp, base and top products, colors, files and prep tools, cleanup items, and removal supplies. Ongoing categories include replacement colors, top or base products, consumables, and products needed for the removal routine. A lamp can make the first purchase feel more equipment-heavy even if the color collection begins small.
Dip's upfront categories include powders, the system liquids, files and shaping tools, containers or supplies for hygienic powder portioning, and removal supplies. Ongoing categories include replacement liquids, new colors, powders, and cleanup or removal consumables. A traditional dip setup may omit a lamp, but it still benefits from organized storage and a consistent work surface.
Before buying, check what a kit actually includes rather than comparing package size alone. The existing gel polish set page and dip powder kit page can help you review listed components, but current manufacturer instructions should decide which lamp, liquids, cleanup method, and removal process apply to the products in your cart.
Decision profiles: which system fits your priorities?
Choose gel polish if you prioritize controlled art and a sleek finish
Gel is a strong match for the at-home user who enjoys painted designs, wants the flexibility to correct brush placement before cure, or prefers a thin-looking color application. It also suits someone who is comfortable dedicating space and time to a lamp-based routine. Choose it because you want its brush-and-cure workflow, not because you expect it to eliminate removal work.
Choose traditional dip if you want a lamp-free, structured color routine
Dip may suit you if you prefer solid color, glitter, or powder-driven effects; want to avoid adding a lamp to your tools; and do not mind working through a fixed sequence of liquids, powder, activator, shaping, and finish. It can be a practical fit for someone who likes a more rigid coating feel and is willing to manage powder portions carefully.
Consider your removal habits before choosing either one
If you change colors frequently, neither system is a truly zero-maintenance answer. Gel may make the creative application phase more flexible, while dip may make you more likely to plan a full rebuild when you want a different color. In both cases, the best system is one whose removal steps you can follow patiently rather than rush.
Pause if skin contact or prior reactions are part of the picture
If you regularly flood product onto skin, have trouble keeping liquid coatings off the sidewalls, or have had a previous reaction to nail products, improving application boundaries matters more than chasing a particular marketing label. Do not select a system on the assumption that lamp-free means risk-free or that HEMA-free means no reaction is possible.
The bottom line
Gel polish and dip powder are not interchangeable versions of the same at-home manicure. Gel is the brush-controlled, lamp-cured choice for glossy color and detailed art. Traditional dip is the air-set, powder-built choice for someone who prefers a lamp-free process and a more structured coating. Choose based on your preferred workflow, finish, hygiene routine, removal tolerance, and product-handling discipline—not on a universal promise about wear, nail health, or sensitivity.