If you've scrolled TikTok in the last few months, you've probably seen it: bright blue nails everywhere, and a whole lot of people swearing it's not just a color choice — it's a strategy. The "Blue Nail Theory" blew up because it taps into something real about color psychology and self-perception, and honestly? It's one of the most fun trends I've worked with in a while. I decided to put my own spin on it with a cobalt blue French tip — sharp smile lines, bold color, dopamine energy — and I'm walking you through every single step so you can try it at home or in your salon.
What Is the Blue Nail Theory?
Okay, so here's the gist. The Blue Nail Theory started circulating on TikTok around early 2024 and picked up serious momentum. The idea is simple: when you paint your nails blue — specifically a bold, saturated blue like cobalt or royal blue — you attract more compliments, more attention, and even more romantic interest. People started documenting it. They'd switch from their usual nude or pink set to blue and report back that strangers were literally stopping them to comment on their nails.
Now, is there hard science behind this? Not exactly a peer-reviewed study. But the reasoning isn't totally pulled from thin air either. There's actually a decent amount of research on color psychology that supports the core idea.
The Psychology Behind It
Blue is one of the most universally favored colors across cultures. Studies in color psychology — like the ones cited by researchers at the University of Winnipeg and in Angela Wright's Colour Affects system — consistently show that blue conveys trustworthiness, calm confidence, and approachability. It's non-threatening. It doesn't trigger competition or aggression the way red can.
So when you wear a bold blue on your nails, a few things happen at once:
- It stands out without being confrontational. Most people default to neutrals, pinks, or reds for their nails. Blue is unexpected, which makes people notice — but the color itself feels inviting, not aggressive.
- It signals confidence. Choosing an unusual, bold color reads as self-assured. You're not playing it safe. That energy tends to attract people.
- It sparks conversation. A bright cobalt blue manicure is a conversation starter. "Oh my god, I love your nails" is basically the gateway to connection, and the Blue Nail Theory leans into that hard.
- It shifts your own mood. This is the "dopamine" part. Wearing a color that feels vibrant and intentional actually does affect how you carry yourself. You notice your own hands more. You feel more put-together. That internal shift changes how others perceive you.
The TikTok community latched onto all of this and turned it into a full-on phenomenon. People started calling their blue manicures their "secret weapon." Whether you buy into the romantic attraction angle or not, the confidence boost alone is worth something.
Why I Chose a French Tip for This Trend
Here's where I got nerdy. I love a full cobalt nail — don't get me wrong — but I wanted something with a little more visual complexity. A French tip with a sharp blue smile line gives you that dopamine pop of color while keeping some of the classic structure that makes French manicures feel polished (pun intended). It's also way more wearable for people who aren't sure about committing to an all-blue set. You get the color, the conversation starter, and a design that looks intentional and elevated without going full Smurf.
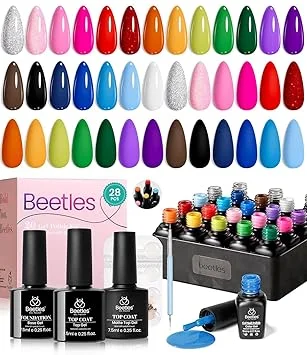
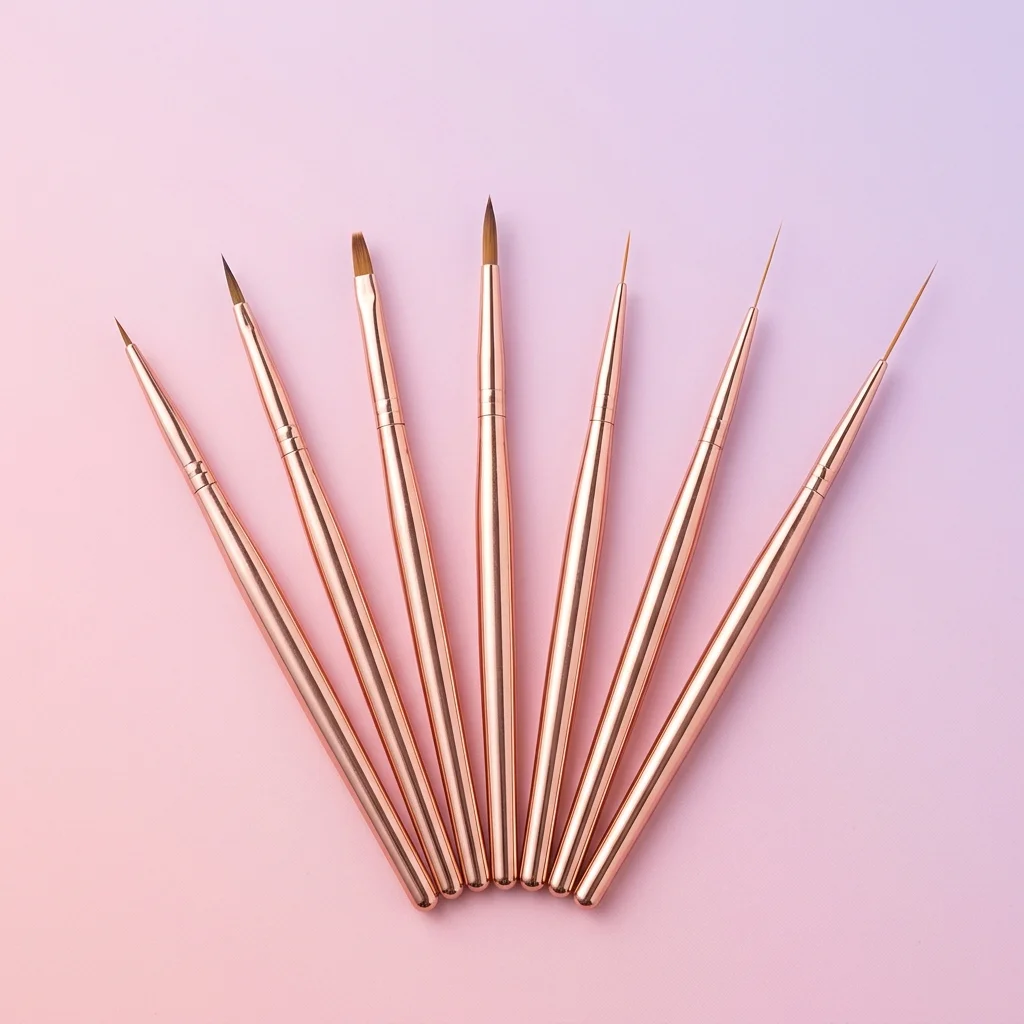
I used the Beetles Gel Polish Set — specifically their cobalt/royal blue shade — paired with Saviland Liner Brushes for the detail work. Here's why that combo works so well and exactly how I did it.
Products I Used
| Product | Why I Picked It |
|---|---|
| Beetles Gel Polish – Cobalt Blue (from their blue set) | Highly pigmented, smooth formula, great coverage in two thin coats. The blue is vibrant without being neon — perfect for the Blue Nail Theory vibe. |
| Beetles Gel Polish – Milky White (base for French) | Sheer enough to look natural but gives a clean canvas for the blue smile line. I like a "your nails but better" look underneath. |
| Saviland Liner Brush Set (sizes 7mm and 11mm) | Fine, flexible bristles that hold their shape. The 7mm is my go-to for smile lines — it gives me control without stiffness. |
| Beetles Base Coat and No-Wipe Top Coat | Reliable adhesion and a glassy finish. Cure each layer for 60 seconds under an LED lamp. |
| 99% Isopropyl Alcohol + Lint-Free Wipes | For cleaning up edges and prepping the nail surface. |
Mapping the French Smile Line to Your Nail Shape
This is the step most people rush through, and it's honestly the most important one. A French tip lives or dies by the smile line placement. Get it wrong and the whole set looks off — too short, too deep, uneven. Get it right and it's magic. Here's how I map it based on different natural nail bed shapes.
Step 1: Read Your Nail Bed
Before you touch a brush, look at each nail individually. I know that sounds obvious, but I see techs (and DIYers) try to paint the same smile line on every nail regardless of shape. Your nail beds aren't identical — treat them like individuals.
Here's what I'm looking at:
- Wide/flat nail beds: These nails are broader than they are long. The smile line should follow a gentle, wide curve. Don't make it too deep (too close to the cuticle) or it'll make the nail look stubby. I keep the smile line at roughly the top third of the nail.
- Narrow/curved nail beds: These are more oval or almond-shaped naturally. The smile line can follow a deeper, more dramatic "U" shape. You've got room to play with a slightly lower dip in the center.
- Uneven or asymmetric nail beds: Some people have nails where one side grows higher than the other. This is super common on the ring finger and pinky. Don't try to force a perfectly symmetrical smile line — instead, match it to the natural contour of the free edge. It'll look more intentional and polished.
- Short nail beds (high smile line naturally): If the white of the nail starts high up, you don't need to paint a deep French tip. Just follow the natural line. A thin, sharp blue accent on the very edge actually looks incredibly chic on short nails.
- Long nail beds: You've got space to work with. I usually place the smile line about 1/3 of the way down from the free edge, but with long beds you can go a bit deeper if the client wants a more dramatic look.
Step 2: Mark the Center Point
I take my Saviland liner brush (dry, no polish yet) and just visually — or very lightly — identify where the center of the smile line should hit on each nail. This is your anchor. Everything else radiates from here. For most people, the center of the smile line sits right around where the nail bed meets the free edge, maybe a hair lower.
Step 3: Draw Guide Dots
With a tiny bead of the cobalt Beetles gel on my Saviland 7mm liner brush, I place three tiny dots on each nail: one at the center point and one on each side, following the curve of the nail. This gives me a roadmap before I commit to the full line. I cure for 30 seconds to lock them in, then step back and check symmetry. If something's off, I file the dot away and re-place it. Way easier than correcting a full line.
Step-by-Step: Painting the Cobalt Blue French Tips
Prep
Standard nail prep — push back cuticles, lightly buff the surface, cleanse with alcohol. Apply a thin layer of Beetles base coat and cure for 60 seconds under your LED lamp. Then apply one thin coat of the milky white Beetles gel as your base color. Cure 60 seconds. If you want a slightly more opaque look, do two coats. I personally prefer one coat so you can still see the natural nail through it — it gives that clean, expensive look.
Painting the Smile Line
- Load your brush. Dip the Saviland 7mm liner brush into the Beetles cobalt blue gel. You want a decent amount of product on the brush, but not a glob. Wipe one side of the brush on the bottle edge so you have a clean, tapered point on one side and product on the other.
- Start from the center. Place the brush tip at your center dot and press gently to fan the bristles slightly. This creates a smooth, even width.
- Sweep to the right side. In one fluid motion, curve the brush from the center toward the right edge of the nail, following the guide dot you placed earlier. Don't rush. Keep steady pressure. The Saviland brush is flexible enough to follow the curve naturally — just guide it.
- Pick up and reposition. Don't try to drag back to the center. Instead, pick the brush up, reload if needed, and go back to the center dot. Now sweep to the left side.
- Check the thickness. You want the smile line to be consistent — roughly 2-3mm wide depending on nail size. If one side is thicker, you can gently go back and refine, but work quickly before the gel self-levels too much.
- Fill in the tip. Once the smile line is clean, use the same brush (or switch to the 11mm for faster coverage) to fill in everything from the smile line to the free edge with the cobalt blue. Two thin coats are better than one thick one — less chance of wrinkling in the cure.
- Cure each coat for 60 seconds. LED lamp. Don't skimp on cure time with highly pigmented gels — they can stay tacky or soft if under-cured.
- Clean up edges. If any blue got on the skin or cuticle area, use a small brush dipped in alcohol to clean it up before curing. This is where those Saviland liner brushes double as cleanup tools.
- Top coat. One layer of Beetles no-wipe top coat, cap the free edge, cure 60 seconds. Done.
What I liked
- The Beetles cobalt blue is seriously pigmented. Two coats and it's opaque, no streaking.
- Saviland liner brushes hold a sharp line beautifully — the bristles don't splay after one use.
- The French tip format makes the blue feel wearable even for people who "don't do bold colors."
- Clients (and friends I tested this on) got noticeably more compliments than usual. The theory held up.
- Total product cost is under $30 if you're doing this at home. Beetles sets are incredibly affordable.
What bugged me
- The Beetles cobalt blue is a bit thick straight from the bottle. I had to warm the bottle in my hands for a minute to get it flowing smoothly for the liner work.
- The Saviland brushes need a proper break-in — first use felt slightly stiff. By the second nail they were perfect.
- On very short nails, the smile line can look crowded. I'd recommend growing out just a few millimeters of free edge before attempting this design.
Best for
Anyone curious about the Blue Nail Theory who wants something more elevated than a solid color. Great for medium to long nail lengths, and perfect for people who love a classic French shape but want to shake it up. If you're a nail tech, this is a fantastic upsell — "Dopamine French" is an easy sell when clients are already asking about the trend.
Skip if
You have extremely short natural nails with barely any free edge — there just isn't enough real estate for the smile line to breathe. Grow them out a bit first. Also skip if you're not comfortable with liner brush work; practice on a nail tip a few times before going live on your hands or a client.
Tips for Success
- Warm the Beetles cobalt gel before use. Hold the bottle in your hands or set it near your lamp for a minute. Thinner consistency = smoother brush strokes.
- Use the 7mm Saviland brush for the smile line and the 11mm for filling in the tip. Switching brushes speeds things up and gives you better precision where it matters.
- Map first, paint second. Those guide dots are your best friend. Even experienced techs benefit from marking before committing.
- Keep your brush clean between nails. Wipe it on a lint-free pad with a tiny bit of alcohol. Dried gel on the bristles will mess up your line quality.
- Don't cure until you're happy with the line. Gel won't set until you put it under the lamp, so take your time. If you mess up, wipe it off with alcohol and start again. No pressure.
- Try a matte top coat for a different vibe. I tested this with a matte finish and it looked incredible — more editorial, less "French tip at the salon." Two totally different moods from the same design.
- Pair with minimal jewelry. The blue does the talking. A simple gold band or thin chain lets the nails pop without competing accessories.
Frequently Asked Questions
Does the Blue Nail Theory actually work?
Look — I can't guarantee romantic outcomes from a manicure. But in my experience and from what I've seen online, bold blue nails genuinely do attract more compliments and attention than neutral shades. The color psychology is real: blue reads as confident and approachable. Whether that translates to your love life is between you and the universe, but you'll definitely feel good wearing it.
Can I do this with regular polish instead of gel?
You can, but gel is so much more forgiving for French tip work. With regular polish, you have a limited working time before it starts to dry, and correcting mistakes is harder. If gel isn't an option, use a striper brush (not a liner) with regular polish and work quickly. But I'd honestly recommend investing in a basic LED lamp and gel kit — it'll change your nail game completely.
What if my smile lines aren't even?
Almost nobody's are. That's normal. Use those guide dots I mentioned, and remember — slight imperfections disappear once the full set is done. If one side is noticeably off, wipe it with alcohol on a small brush before curing and redo that section. Nobody's going to be measuring your nails with a ruler.
Which shade of blue works best for the Blue Nail Theory?
From what I've seen trending, cobalt blue and royal blue are the front-runners. They're bold without being neon, saturated without looking dark. The Beetles cobalt shade hits that sweet spot perfectly. Avoid pastels if you want the full "stop and stare" effect — the theory relies on the color being noticeable from a distance.
How long will this design last?
With proper prep, good base coat, and a quality top coat like the Beetles no-wipe, you're looking at 2-3 weeks easily. The smile line won't chip because gel doesn't chip the way regular polish does. You'll see regrowth at the cuticle before anything happens to the tip design.
I'm not going to sit here and tell you a blue French tip will change your life. But I will say this: I've painted hundreds of sets over the years, and few things have gotten as much genuine, enthusiastic attention as these cobalt tips. There's something about the combo of a classic shape and an unexpected color that just hits different. The Blue Nail Theory caught on for a reason — it's fun, it's bold, and it works. Grab that Beetles set, practice your smile lines on a few tips, and give it a shot. Worst case? You've got a gorgeous manicure. Best case? Well… you've seen the TikToks.