
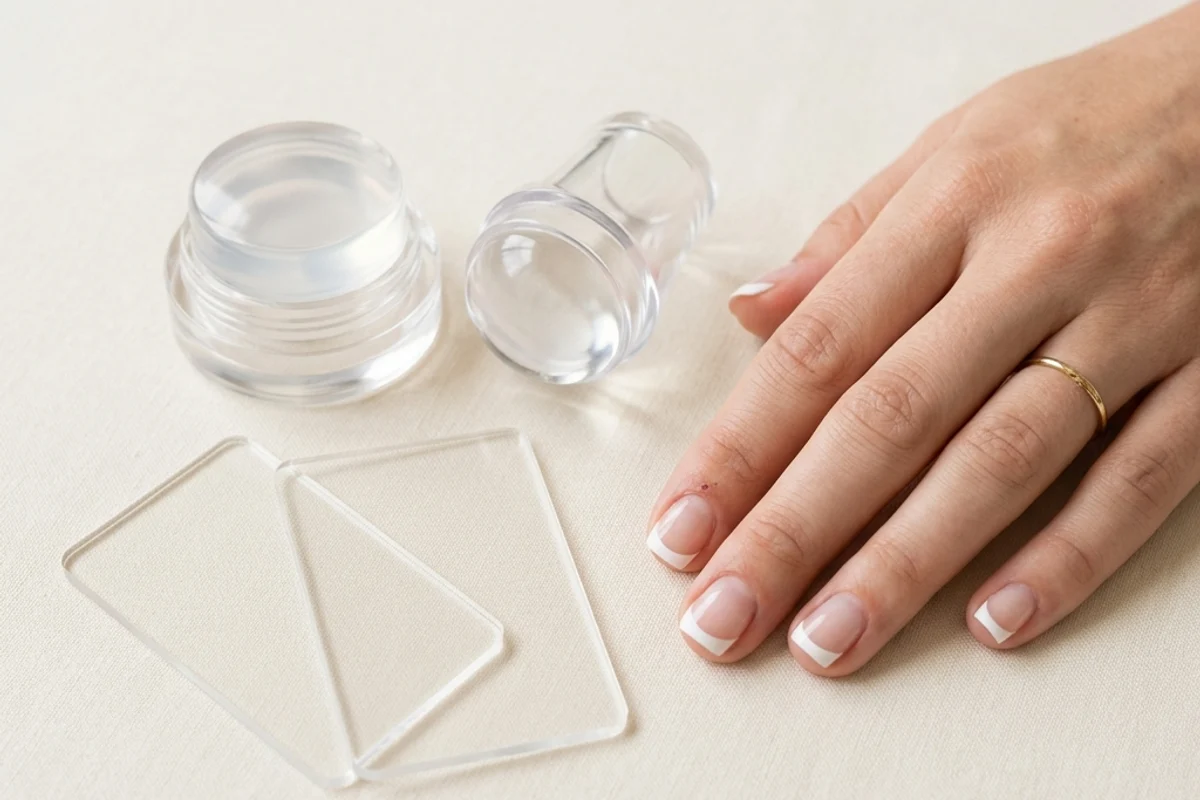
I've been testing this French Tip Nail Stamper Kit for about six weeks now — long enough to get through two full sets on myself and a handful of practice sessions on tips. I compared it head-to-head with freehand painting, French tip guides/stickers, and a standard scraper-and-stamp setup I've had in my drawer for a couple years. If you've ever sat there with a striper brush trembling like you've had four espressos, this one's for you.
French tips are one of those services that look deceptively simple but can wreck your confidence fast. A clean, consistent smile line across ten nails is genuinely hard to freehand — even seasoned techs have days where their hands just won't cooperate. That's why tools that help nail that curve consistently are worth talking about. Stamping has been around for a while, but French-tip-specific stampers are a newer niche, and this kit leans into that idea pretty hard. Let's get into what actually works and what doesn't.
Verdict: A solid shortcut for clean smile lines, but it's not quite "stamp and done"
This kit gets you about 80% of the way to a flawless French tip in a fraction of the time it takes to freehand. The silicone pad grabs polish well, the curved plates give you a natural-looking smile line, and cleanup is manageable. But it's got a learning curve of its own, and you'll still need to do some touching up — especially around the sidewalls. For at-home users and newer techs, it's a genuinely useful tool. For experienced nail artists, it's more of a time-saver on busy days than a replacement for your striper brush.
How it scored:
Ease of use: 7.5/10 — Getting the hang of loading the plate and picking up the design took me about four or five practice stamps. Not bad, but it's not as intuitive as the packaging suggests.
Design quality: 8.0/10 — The curves on the plates look natural, and the silicone stamper head is soft enough to conform to the nail. Solid build for the price.
Stamp accuracy: 7.0/10 — The smile line transfers cleanly on most nails. Thumbs and pinkies sometimes need a little extra attention because the curve doesn't always line up perfectly with smaller or wider nail beds.
Durability: 7.5/10 — Six weeks in and the silicone pad still picks up fine. The scraper has a small nick on the edge already, though.
Value: 8.0/10 — You get multiple plates, the stamper, and a scraper. For what you're paying, it's a reasonable package, especially if it saves you from redoing shaky freehand tips.
Specs
| Specification | Detail |
|---|---|
| Stamper type | Clear silicone (jelly-style), soft/medium firmness |
| Plate material | Etched stainless steel |
| Number of plates | 3 curved French tip plates (varying smile line depths) |
| Scraper included | Yes — plastic card-style |
| Stamp head diameter | Approximately 3.5 cm |
| Plate size | Roughly 6 × 4 cm per plate |
| Compatible polish types | Stamping polish, regular polish (opaque shades work best), some gel polishes with modification |
| Cure method | N/A — air dry or cure over gel base as usual |
| Weight (full kit) | Light — fits in a small pouch |
Design & Build Quality
Let me start with the plates. You get three of them, each with slightly different smile line curves — a subtle "C" curve, a deeper dramatic arc, and something in between. That's smart because not every client (or your own nails) look good with the same shape. The etching on the steel plates is clean and precise. I ran my fingernail across the engraved lines and they're consistent depth-wise, which matters because shallow etching means the polish doesn't fill in properly and you get a patchy transfer.
The clear silicone stamper is the star here. It's the jelly-style type where you can see through it, which helps you position the smile line on the nail. The silicone has a nice medium squish — not so soft that it collapses and distorts the design, but soft enough to roll onto the curved surface of the nail without lifting the polish off in patches. I've used rock-hard stampers before that are basically useless on anything but flat swatches, so this was a relief.
The scraper is fine. It's a basic plastic card. I've seen better scrapers — I actually prefer a old gift card because it's stiffer and gives a more even scrape — but it works. My one gripe: after maybe thirty uses, the edge on the included scraper started to get a little ragged, and I noticed some streaky pickups that cleared up when I switched to my own card. Not a dealbreaker, but worth mentioning.
The overall kit is packaged simply. No bulky case, no unnecessary extras. Everything fits in a small zip bag, which I actually appreciate because my station doesn't need more clutter.
Performance: Real Testing
Here's where it gets interesting — and where I want to be really honest about what to expect.
First attempt (practice on a swatch stick): I loaded the plate with a white stamping polish, scraped once, and rolled the stamper across. The pickup was about 90% clean. The smile line looked great on the swatch. Confidence was high.
Second attempt (on my own nails): Reality check. I pressed the stamper onto my index finger and the line was a little crooked because I didn't angle it right. Also, I'd prepped my nail with a nude gel base that was cured and slightly tacky — the stamper pulled up some of the tacky layer and left a weird texture under the white tip. Lesson learned: you need to either wipe the inhibition layer or work on a fully buffed, non-tacky surface.
Third through tenth attempts (after I figured out the prep): Once I had the surface right — cured gel base, wiped clean, no residue — the stamps started coming out much better. I'd say seven out of ten nails came out with a clean, usable smile line on the first stamp. The remaining three needed a tiny bit of cleanup with a detail brush around the sidewalls where the curve of the stamp didn't perfectly match the curve of my nail.
On different nail shapes: I tried this on almond, square, coffin, and round nails. Round and almond worked best because the smile line curve on the plates naturally follows those shapes. Square and coffin were trickier — the corners don't always get full coverage, and I had to go back in with a brush to extend the tip line out to the edges. Not a huge deal, but it's an extra step.
Polish compatibility: Stamping-specific polish (I used a Born Pretty white) worked the best by a mile. Thick, opaque, and designed to stay wet on the plate just long enough. I also tried a regular OPI white lacquer — it worked, but I had to move fast because it dried quicker on the plate, and the pickup was thinner. Regular polish also seemed to dry faster on the stamper, so I had a smaller window to place it on the nail. If you're using regular polish, work one nail at a time and don't dawdle.
With gel polish: This is where I'll push back on some claims I've seen online. Yes, you can use gel polish for stamping, but it's fiddlier. Gel doesn't dry on the plate the way regular polish does, so it can smear during transfer if you're not careful. I had the best results using a thin layer of gel on the plate, scraping gently, and curing the transfer on the nail for 30 seconds under my LED lamp before continuing. It works, but it adds time and patience. For a first-timer, I'd honestly stick with regular stamping polish.
Comfort & Usability
Physically using the stamper is easy. It's light, the silicone head has good grip without being sticky, and the transparent body means you can see exactly where you're placing the design. I have mild carpal tunnel in my right wrist, and after stamping all ten nails I didn't feel any fatigue or strain — it's basically just a quick press-and-roll motion.
The mental comfort is where I struggled at first. If you've never stamped before, there's this moment of panic when you lift the stamper off the plate and see the design sitting there, seemingly ready to smudge if you breathe on it wrong. You have to commit and place it on the nail with a smooth rolling motion — no hesitation, no repositioning. That took me a few tries to get comfortable with. Once it clicked, though, it became second nature.
Cleaning is straightforward. The plates wipe down with pure acetone and a cotton pad. The silicone stamper head can be cleaned with tape (lint roller style) — don't use acetone on it because it'll cloud and degrade the silicone over time. This is important and something I wish the instructions mentioned more clearly. I did accidentally hit it with acetone once, and while it didn't ruin it immediately, I could feel the surface getting slightly tackier afterward.
How It Compares
| Feature | This Kit | French Tip Guide Stickers | Freehand Striper Brush |
|---|---|---|---|
| Speed (per full set) | ~15-20 min once practiced | ~20-25 min | ~30-45 min (varies by skill) |
| Consistency | Good — minor sidewall cleanup needed | Very consistent if stickers adhere well | Depends entirely on skill level |
| Learning curve | Moderate — 4-5 practice stamps | Low — peel and paint | High — takes weeks/months to master |
| Nail shape flexibility | Decent, 3 curve options | One curve per sticker size | Unlimited — you control everything |
| Works on curved nails? | Yes, stamper conforms | Sometimes lifts on extreme C-curves | Yes, with skill |
| Mess factor | Low — some plate cleanup | Low — peel off stickers | Medium — cleanup brushes, acetone |
| Cost per use | Low after initial kit purchase | Ongoing cost — stickers run out | One-time brush purchase |
| Pro-level result? | Close, with touch-ups | Can look slightly "stamped" | Yes, when done well |
Compared to stickers, this stamper kit wins on cost over time and shape versatility. Stickers are quicker to learn, but they peel up on me sometimes — especially if the nail has any curvature or if I'm working with clients whose nails are naturally oily. The stamper doesn't have that adhesion problem.
Compared to freehand, well… freehand will always be king if you've got the chops. But I don't always have 40 minutes per set, and some days my hands just aren't cooperating. This kit is a great plan B that gets you 90% of the freehand quality in half the time.
What I liked
- Three different smile line curves — smart inclusion, lets you customize the look
- Clear silicone stamper makes positioning foolproof
- Picks up design cleanly with proper polish (stamping polish recommended)
- Lightweight and compact — easy to store or travel with
- Dramatically faster than freehand once you've got the technique down
- Works on natural nails, gel, and acrylic — versatile across service types
What bugged me
- Sidewalls still need touch-up work on wider nail shapes (square, coffin)
- Plastic scraper wore down fast — plan to use a stiffer card instead
- Regular polish dries too quickly on the plate for comfortable use
- Gel polish stamping works but is fiddly and not beginner-friendly
- Instructions could be way more detailed on prep and cleaning (especially the no-acetone-on-silicone rule)
- On very small nails (think pinky on petite hands), the stamp is almost too wide and placement gets tricky
Who should grab it
If you're an at-home nail enthusiast who loves French tips but can't freehand a clean line to save your life, this kit will change your routine. It's also great for newer nail techs who want to offer consistent French tip services while they're still building their freehand skills. And honestly, even experienced techs doing high-volume days will appreciate the time savings. If you do a lot of French tips — like, it's a top-three requested service — keep this in your kit as a reliable backup.
Who should skip it
If you're an advanced nail artist who can freehand a perfect smile line in your sleep, you probably don't need this. It's not going to replace your skill — it's a shortcut, not an upgrade. Also, if you exclusively work with very narrow or very wide nail beds that fall outside the range of the three plate curves, you might find the fit frustrating. And if you're someone who gets annoyed by any tool that requires practice before it works well, just know there IS a learning curve here.
Tips for Getting the Best Results
- Always use stamping-specific polish for the white tip. I can't stress this enough. Regular polish dries too fast on the plate and gives thin, patchy transfers. A good stamping white runs a few bucks and lasts forever since you're using so little per stamp.
- Wipe the inhibition layer off your cured gel base before stamping. Tacky surface = the stamper grabs the base coat instead of just the stamped design. Learned this the messy way.
- Scrape once, firmly, at a 45-degree angle. Multiple scrapes remove too much polish from the etched lines and give you a faint transfer. One confident scrape is the sweet spot.
- Roll, don't press. Place the stamper at one edge of the nail and roll it across to the other side in one smooth motion. If you straight-up press down, you'll get smearing and distortion.
- Clean the stamper with tape, not acetone. A lint roller or a piece of packing tape pressed onto the silicone and pulled off will remove residual polish without damaging the surface.
- Practice on swatch sticks first. Seriously, don't do your first stamp on a paying client or your own freshly prepped nails. Grab some clear swatch sticks and do five or six practice rounds.
- Use the plate that matches your nail shape. For almond and oval nails, the shallower "C" curve plate usually looks most natural. For square nails, go with the deeper arc so the smile line reaches closer to the sidewalls.
- Keep a detail brush handy. You'll almost always need to clean up the very edges near the sidewalls. A small flat brush dipped in acetone makes quick work of it.
Questions People Keep Asking
Can I use this on gel nails?
Yes, but with some caveats. The easiest approach is to apply your gel base color, cure it fully, wipe the tacky layer, then stamp over the cured surface with regular stamping polish. Seal everything with a gel top coat and cure. You can technically use gel polish for the stamp itself, but it's trickier — gel stays wet on the plate longer, so it can smear during transfer unless you're very quick and careful.
Does it work on acrylic nails?
Absolutely. Acrylic nails with a smooth, filed surface take stamping really well. Just make sure the surface is clean and free of dust or oils before you stamp. I've used it over sculpted acrylics multiple times without issues.
How do I get the smile line centered on the nail?
That's where the clear stamper really helps — you can see through it to line up the curve with the free edge of your nail. My trick: I look at the nail head-on through the stamper and aim to have the smile line sitting right where the natural free edge would begin. If it's off by a hair, you can gently push or rotate the stamper before the polish sets, but you've only got a second or two.
Will regular nail polish work for stamping?
It can, but results vary a lot by brand and shade. You want an opaque, slightly thick formula. Thin, sheer polishes won't transfer well because they dry too fast on the etched plate. If you're going the regular polish route, try a one-coat white like Sally Hansen or a thick Essie shade. Work fast — you've got maybe 10-15 seconds before it dries on the plate.
How long does the silicone stamper last?
I've been using mine for six weeks and it's still picking up fine. From my experience with other silicone stampers, they can last several months to a year if you treat them right — meaning no acetone, no rough handling, and store them away from direct sunlight. They do eventually lose their tackiness, but replacement heads are cheap.
Is this better than French tip guide stickers?
It depends on what you value. Stickers are easier for beginners — literally peel, stick, paint, remove. But they can lift on curved nails, they're a recurring cost since you run out, and the smile line shape is fixed. This stamper kit has a learning curve but offers more control over the curve shape, works better on curved nails, and the kit itself lasts indefinitely. For regular French tip wearers, I think the stamper is the better long-term investment.
Bottom Line
This French Tip Nail Stamper Kit won't make you a freehand master overnight, but it will give you cleaner, more consistent smile lines in way less time than painting them by hand. The three plate options are a nice touch, the clear silicone stamper is genuinely useful for positioning, and once you nail the technique (pun intended), you can bang out a full French set in under 20 minutes. It's not perfect — sidewall cleanup is almost always necessary, the scraper could be better, and gel polish stamping is more hassle than it's worth for beginners. But for the price and the convenience, it earns a permanent spot in my kit for days when I need a reliable shortcut. If you've been struggling with shaky-hand French tips, give it a few practice rounds before you judge. It clicks faster than you'd think.
Disclosure: This post may contain affiliate links. If you purchase through them, I may earn a small commission at no extra cost to you. I only recommend products I've actually used and believe in. All opinions are my own — always have been, always will be.