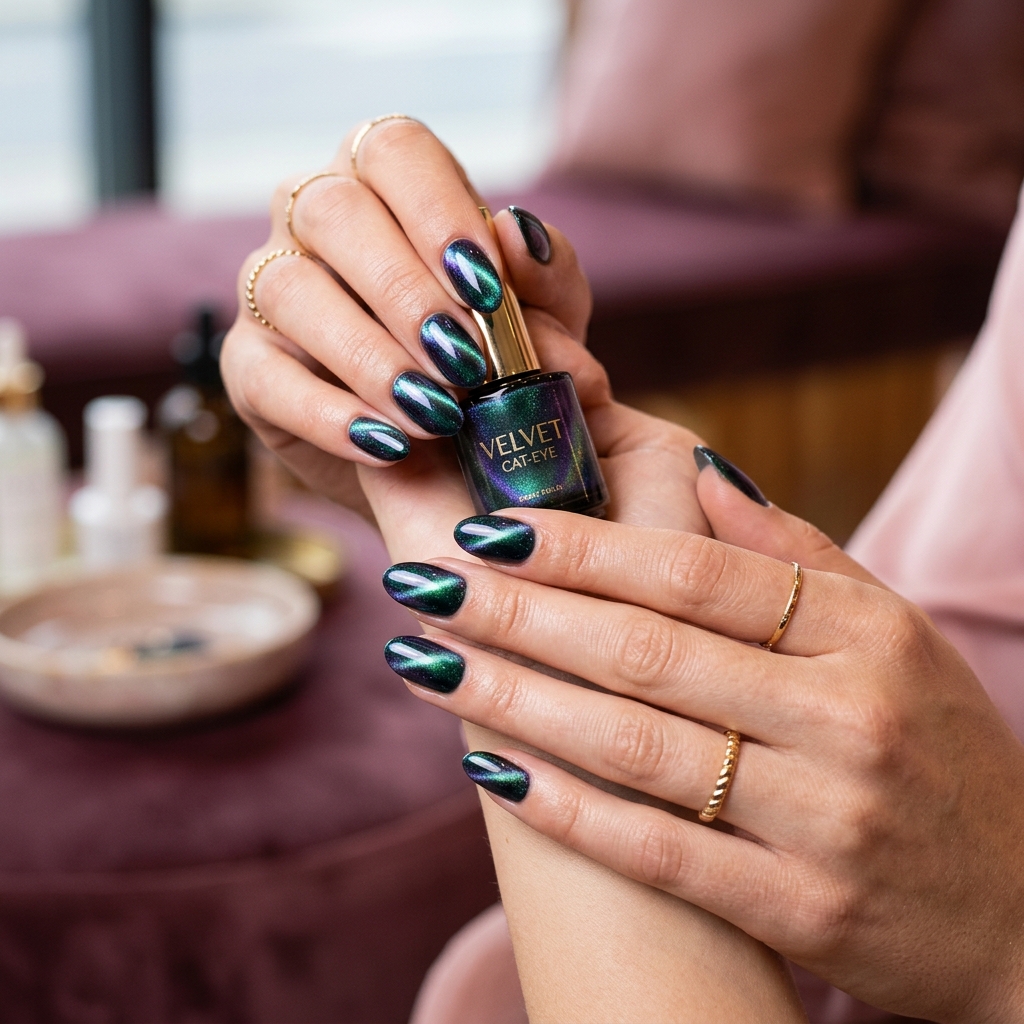
Cat eye nails look expensive because the shimmer is not just glitter sitting on top — it bends into a thin reflective beam that moves when your hand moves. The good news: you do not need salon-only tools to get that velvet, galaxy, or diagonal cat-eye effect at home. You do need the right magnetic gel, a strong enough magnet, thin coats, and a curing routine that locks the line before it spreads.
This guide walks through the exact at-home method I would use for a clean cat eye manicure: what to buy, how to prep, how to hold the magnet, why the line sometimes disappears, and how to fix the most common mistakes. If you already own a gel lamp, this is one of the easiest nail art upgrades to learn.
Best first technique: diagonal velvet cat eye
Paint one thin magnetic coat, hover the magnet diagonally for 10–15 seconds, flash cure immediately, then seal with glossy top coat. It is simple, flattering, and much easier than trying to sculpt a perfect circle on your first try.
What you need for cat eye nails
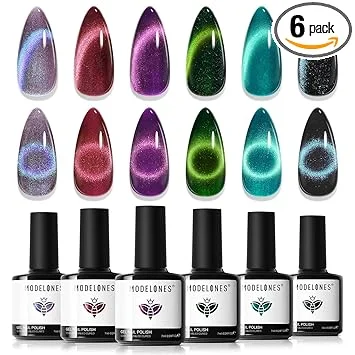
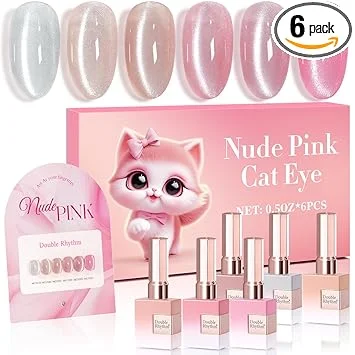
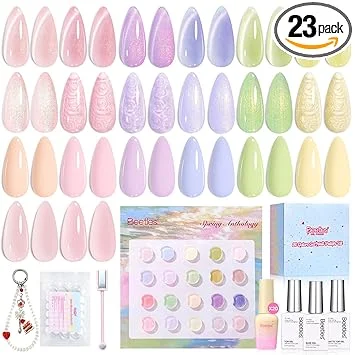
Start with a real magnetic gel polish, not regular shimmer polish. A set like modelones Cat Eye Gel Polish is beginner-friendly because it includes multiple jewel tones and a magnet, while Double Rhythm Cat Eye Gel is better if you want a softer, reflective nude-pink look. If you prefer pastel shimmer instead of dark galaxy nails, the Beetles Pastel Cat Eye Set gives you spring colors that still show the magnetic beam.
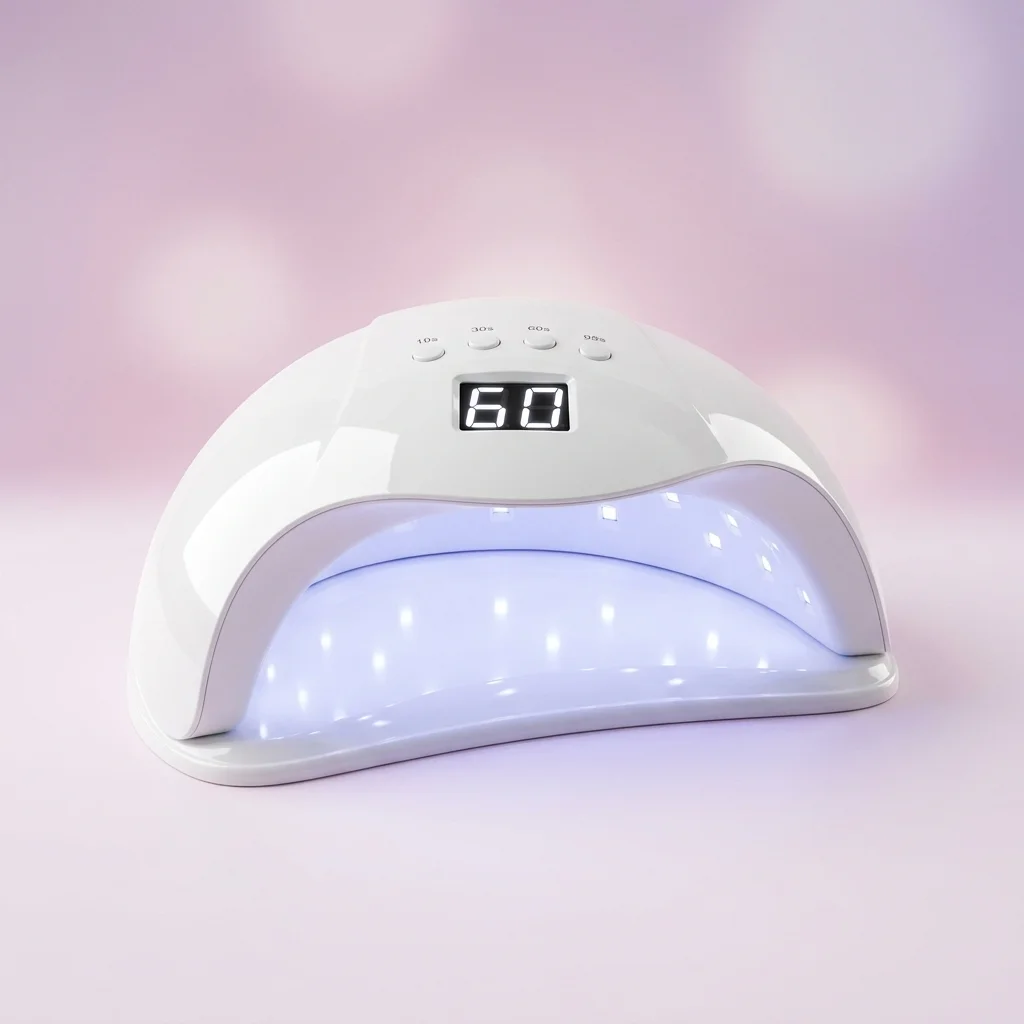
You also need base coat, no-wipe top coat, lint-free wipes, alcohol, cuticle pusher, a fine buffer, and a UV/LED lamp. For curing, a roomy 48W lamp such as the SUNUV Sun4 Nail Lamp is a safe pick because cat eye gel can look cured on the surface before it is fully set underneath. A weak mini lamp can work for flash-curing the magnet line, but I would still do the final cure under a full-size lamp.
| Tool | Why it matters | Beginner tip |
|---|---|---|
| Magnetic gel polish | Contains metal particles that move under a magnet | Dark colors show the beam most clearly |
| Cat eye magnet | Pulls shimmer into a line, halo, or velvet effect | Hold close, but do not touch wet gel |
| 48W UV/LED lamp | Locks the pattern before it relaxes | Flash cure first, then full cure |
| No-wipe top coat | Adds depth and glassy reflection | Do not magnetize the top coat |
Step 1: prep so the gel does not lift
Cat eye gel is still gel polish, so prep matters more than the design. Push back cuticles, remove dead skin from the nail plate, lightly buff shine, then wipe with alcohol. If oil or cuticle is left on the nail, the manicure can peel no matter how pretty the magnetic line looks.
Apply a thin base coat and cure it according to your lamp and base-coat instructions. Keep the base thin around the cuticle and sidewalls. Thick gel pools at the edges, and once the cat eye pigment moves, those pooled areas can look cloudy.
Step 2: use a dark base if you want drama
Most cat eye gels look deeper over black, navy, burgundy, or chocolate brown. If your magnetic polish is translucent, apply one thin coat of black gel first, cure it, and then add the cat eye gel on top. This creates the classic galaxy beam.
If you want a softer manicure, skip the black and use the magnetic gel by itself over a nude or sheer base. Pastel cat eye shades look more like velvet satin than outer-space shimmer, which makes them easier to wear for everyday nails.
Step 3: apply one thin magnetic coat
Paint a thin, even coat of cat eye gel. Do not cure yet. The magnetic particles need to stay wet so they can move. If you apply the coat too thick, the pigment can swim around and blur instead of snapping into a sharp line.
Before using the magnet, clean up the cuticle line with a detail brush. Once you cure magnetic gel on the skin, removal gets annoying and lifting becomes more likely.
Step 4: hold the magnet correctly
For a diagonal cat eye, hold the magnet about 2–3 millimeters above the nail at a diagonal angle. Keep it still for 10–15 seconds. You should see the shimmer pull into a line. If the line looks weak, move the magnet slightly closer and hold a few seconds longer.
Do not wave the magnet around too much. That is the fastest way to turn a crisp beam into cloudy shimmer. Think of it like taking a photo: place the magnet, hold steady, then cure before the pattern shifts.
Magnet positions to try
- Diagonal: easiest and most flattering on short nails
- Side pull: creates a velvet fade from one edge
- Center line: classic cat-eye beam down the middle
- Halo: use a round magnet or magnet around the edges
Avoid these moves
- Touching the wet polish with the magnet
- Magnetizing every nail, then curing at the end
- Using thick coats to “make it more sparkly”
- Skipping full cure after flash curing
Step 5: flash cure each nail immediately
This is the step that makes cat eye nails look salon-clean. Once the beam looks right, flash cure that nail for 10–15 seconds before moving to the next nail. That short cure freezes the magnetic particles so the line does not relax while you work on the other fingers.
After all five nails are flash cured, do a full cure in your lamp. If your lamp has a low-heat mode, use it for thicker magnetic gels. It is slower, but it helps avoid heat spikes while still curing evenly.
Step 6: add depth with a second magnetic layer
For a stronger effect, add a second thin coat of cat eye gel, magnetize it in the same direction, flash cure, then full cure. Two thin magnetic layers look better than one thick layer because the beam stays cleaner and the gel cures more reliably.
If the first layer already looks bold, stop there. Overworking magnetic gel can make the final manicure look muddy, especially with dark colors.
Step 7: seal with glossy top coat
Top coat is what turns the effect from sparkly to glassy. Apply a smooth layer of no-wipe top coat, cap the free edge, and cure fully. Do not use the magnet on the top coat — the pigment is already locked in the color layer underneath.
After curing, let the nails cool for a minute before applying cuticle oil. Gel can feel hard immediately, but giving it a moment helps avoid surface dents and dullness.
Why your cat eye line disappears
If the magnetic line appears, then fades before you cure, the gel is too wet for too long. Work one nail at a time and flash cure immediately. If the line is weak from the start, your magnet is too far away, the polish needs more mixing, or the shade is too sheer over your base color.
If the line looks blurry after curing, the coat was probably too thick. Remove bulk from the brush before painting, and try two thinner coats instead of one heavy coat.
Best cat eye style by nail length
| Nail length | Best cat eye effect | Why it works |
|---|---|---|
| Short nails | Diagonal beam | Lengthens the nail visually |
| Medium almond | Side velvet pull | Soft, expensive-looking shimmer |
| Long coffin | Center beam or galaxy | Enough space for a dramatic streak |
| Square nails | French cat eye tips | Keeps the look clean and wearable |
FAQ
Can I do cat eye nails with regular nail polish?
You need magnetic polish for the effect. Regular shimmer polish will sparkle, but the particles will not pull into a cat-eye beam.
Do I cure before or after using the magnet?
Use the magnet before curing. Once the gel is cured, the magnetic particles are locked and will not move.
Why does cat eye gel need a strong lamp?
Magnetic gels can be more pigmented and reflective than sheer gels. A strong, even lamp helps cure the whole layer, not just the surface.
Can I use cat eye gel over builder gel?
Yes. Build and shape the nail first, wipe or finish-file if needed, then apply base/color and cat eye gel as the design layer.
How long do cat eye nails last?
With clean prep and a full cure, expect the same wear as a normal gel manicure — usually about two weeks for most at-home users.
Bottom line
The easiest way to get cat eye nails right is to keep everything thin, work one nail at a time, hold the magnet still, and flash cure the second the beam looks good. Start with a diagonal line on a darker base, then experiment with velvet fades and halo effects once your timing feels natural.
Disclosure: Product links may be affiliate links. As an Amazon Associate we earn from qualifying purchases made through links on this page, at no extra cost to you.