Jelly Glass French Nails: The Juicy Translucent Tip Trend
Alright, nail fam, let's talk about the look that's been flooding my feed and my booking requests: jelly glass French nails. It’s not just a manicure; it’s a vibe. Think of that perfect, ripe, juicy fruit slice—that translucent, glowing-from-within color—and pair it with the crisp, clean line of a French tip. That’s the magic of this trend. It’s sophisticated, playful, and surprisingly versatile. I’ve been doing this look non-stop, and I’m here to break down exactly how I achieve it, from the perfect products to the step-by-step technique.
What Exactly Are Jelly Glass Nails?
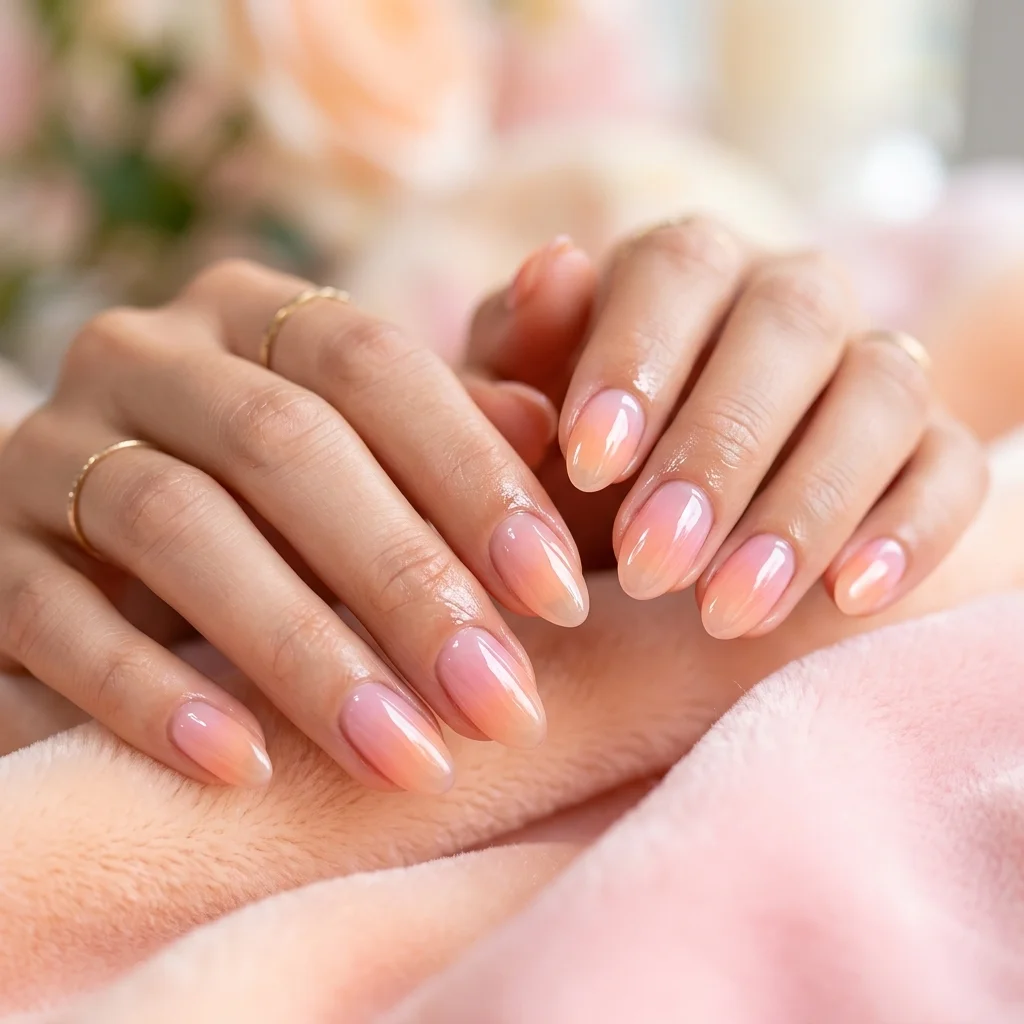
Forget the opaque French tips of the past. The clear French tips trend, specifically in this "glass" or "jelly" form, is all about sheer, buildable color. A jelly nail polish has a translucent, gel-like pigment that lets light pass through, creating incredible depth. When you use this formula to create the tip of a French manicure, you get a tip that looks like a drop of colored glass or a slice of jelly. It’s delicate, modern, and makes your natural nail plate (or a beautifully sculpted extension) part of the design.
Why This Trend is Sticking Around
- It’s Universally Flattering: The sheer pigment adapts to your skin tone. A pink jelly on my fair-skinned clients looks different, but equally stunning, than on my clients with deeper complexions.
- Endless Color Play: From a barely-there champagne to a vibrant electric blue, you can match any mood or season. I especially love soft lavenders and juicy corals for summer.
- The Ultimate "Clean Girl" Manicure: It looks polished and expensive without trying too hard. The translucent gel polish trend is perfect for clients who want something more interesting than nude but less bold than a solid color.
- It’s a Canvas for More: Add some iridescent flakies over the jelly tip, or do a subtle chrome accent line at the smile line. The base is simple enough to accessorize.
Your Product Toolkit for the Perfect Finish
You can't fake this look with the wrong products. Here's my tried-and-true kit for nailing the jelly glass French nails every time.
The Foundation: Building a Flawless Base
- Builder Gel in a Bottle (BIAB) or Hard Gel: For creating a strong, beautiful nail extension or overlay on natural nails. I prefer a clear or sheer pink builder gel for this look, as it keeps the foundation clean and luminous.
- Forms or Tips: Depending on your preferred extension method. I often use sculpted forms with a clear hard gel for the ultimate "glass" effect.
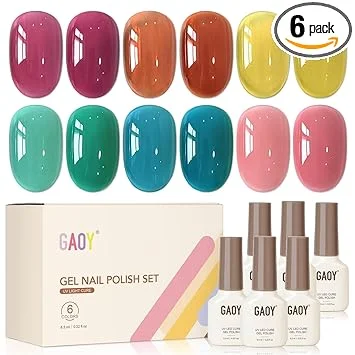
- Jelly/Syrup Gel Polishes: These are the stars. You need polishes specifically formulated to be sheer. My favorites are from brands like Ice Gel's "Jelly Syrup" line, Madam Glam's "Glass" gels, or Kokoist's "E-Mel" series. They come in pots or bottles and have a beautiful, buildable consistency.
- Crystal Clear Gel Top Coat: A high-shine, non-yellowing top coat is non-negotiable. It seals everything in and enhances that wet, glassy look.
The Precision Tools: For That Clean Line
- Liner Brush & Dotting Tool: Your best friends for creating the smile line. A fine liner brush (I like a 5mm or 7mm length) gives you control for a crisp line.
- Acetone & Clean-Up Brush: For perfecting any wobbles before curing. Keep your acetone in a handy pump bottle.
- Lint-Free Wipes & 99% Alcohol: For wiping the tacky layer off your cured base before starting the design. A clean surface is key.
| Product Type | Purpose in This Manicure | Pro Tip |
|---|---|---|
| Clear/Sheer Pink Builder Gel | Creates a strong, natural-looking nail bed or extension. | Apply in thin layers and cure fully. A "floating" technique helps maintain the C-curve. |
| Jelly Syrup Gel Polish (2-3 colors) | Forms the translucent, colored tip of the French manicure. | Start with a sheer layer and build up opacity. Two coats are usually perfect. |
| Fine Liner Gel Polish | Used to draw the smile line (optional but professional). | Use a liner in a slightly darker shade than your jelly for a subtle, defining edge. |
| Crystal Clear Top Coat | Seals the design and provides an ultra-glossy, glass-like finish. | Apply generously and float over the tip to avoid dragging the jelly color. |
Step-by-Step: Creating the Jelly Glass French Manicure
Let's get down to business. I'll walk you through my method after prepping the nails and applying a base coat.
Step 1: Build Your Perfect Canvas
Whether on natural nails or with extensions, you need a flawless, smooth foundation. Sculpt your tip with clear builder gel, shape it to perfection, and refine the surface. Wipe the inhibition layer with alcohol once you're happy with the shape. The clarity of this base is what makes the final look so stunning.
Step 2: The First Sheer Layer
Take your chosen jelly syrup gel polish. Using the brush from the bottle, apply one very sheer coat to the entire nail. Don’t worry about coverage—we’re building depth. Cure fully according to the manufacturer's instructions. This first layer sets the tone and creates a beautiful, subtle base color.
Step 3: Painting the Translucent Tip
Now for the fun part. Load up your liner brush or the polish brush with a bit more of the jelly gel. Starting at the side of the nail, carefully paint a freehand smile line, following the natural curve of the nail. Then, fill in the tip. The key is to keep it sheer on the first pass. You might see the nail bed through it—that's exactly what you want for that juicy, translucent effect. Cure this layer.
Pro Move: The 3D Effect
For extra depth, I sometimes apply a third thin coat of the jelly color just over the tip, making the color slightly more concentrated at the very edge. This mimics the look of a thick, glossy glass piece. Cure again.
Step 4: Define (Optional) and Seal
Want a little more definition? Use your liner brush and a slightly darker gel polish (a deep pink for a red jelly, a mauve for a lavender) to paint a second, thinner line right at the edge of your jelly tip. This adds a professional shadow effect. After curing, it's time for the grand finale: a thick layer of crystal clear gel top coat. Float it over the whole nail, making sure to cap the free edge. Cure for the final time, and then cleanse with alcohol to reveal the ultimate glassy shine.
Pro Tips & Troubleshooting
- Layering is Everything: Don’t try to get full opacity in one go. Multiple sheer layers create that authentic, dimensional jelly effect.
- Clean Your Brush: Between coats, wipe your liner brush on a lint-free wipe with a bit of alcohol to prevent muddy colors.
- The Wobble Fix: If your smile line isn’t perfect, use an acetone-dipped clean-up brush to gently erase the edge and try again before you cure.
- Synergy with Other Trends: This look is the perfect base for the "glazed donut" effect. After your jelly tip, apply a thin layer of sheer chrome or iridescent powder before your top coat.
FAQ: Your Jelly French Questions, Answered
Q: Can I do this with regular polish?
A: Technically, yes, but it’s much harder. Gel polish is designed to be self-leveling and stays put while you work. Regular polish will dry too quickly and won’t give you the same depth or durability. I strongly recommend gel for this specific look.
Q: My jelly polish looks streaky. What am I doing wrong?
A: Streaking usually happens from over-brushing. Apply the polish with a confident, single stroke if possible. Make sure your base layer is fully cured and smooth. Also, check that your jelly polish is well-mixed but not too thick.
Q: How long do these nails last?
A: With proper application and a strong builder gel foundation, you should get a solid 3-4 weeks of wear. The clear top coat is critical for preventing chips and maintaining that shine.
Q: What are the best jelly colors for beginners?
A: Start with softer, more forgiving shades. A sheer baby pink or a milky peach is perfect for practicing your smile line and layering technique before you move on to bold, bright jellies.
Give this trend a try—I promise, once you see that light hitting your first set of jelly glass French nails, you’ll be hooked. It’s a look that’s as fun to create as it is to wear. Tag me in your creations; I’d love to see your juicy tips!