
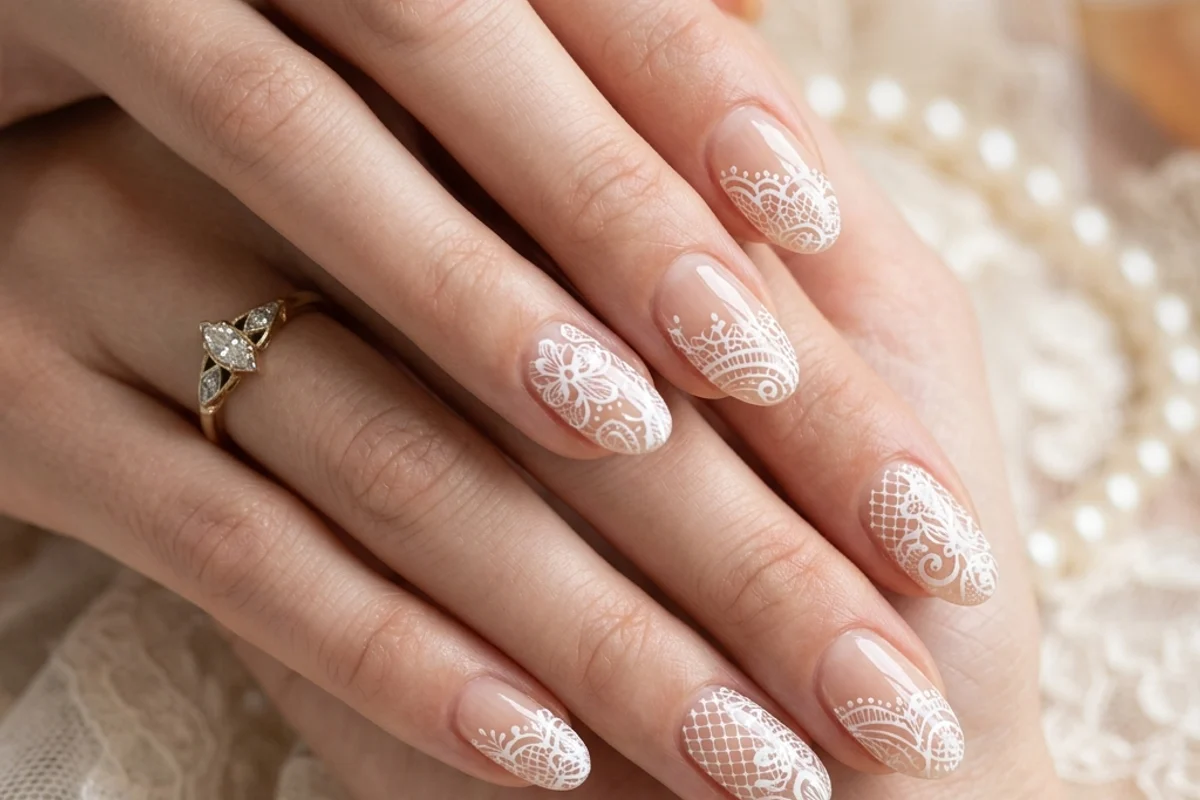
Lace Nail Art: Delicate, Romantic Detail You Can Actually DIY
I get it. You scroll through your feed, see these impossibly intricate, delicate lace nails, and think, "Yeah, no way. That's for nail artists with 20 years of experience and hands steadier than a surgeon's." But here's a secret from behind the nail desk: this look is way more accessible than it seems. With the right brush, a little patience, and this breakdown, you can absolutely create beautiful, romantic nail art at home. Trust me, I've seen clients gasp when they realize the floral lace pattern on their nails was hand-painted. Let's demystify it.
Why "Lace" Doesn't Have to Mean "Impossible"
The trick to lace nail art isn't about having a perfectly steady hand from the get-go. It's about understanding the technique, which is essentially a series of simple dots and connected lines. The magic happens in the consistency of your polish and the tool you use. Once you get the feel for creating a consistent "dot-to-dot" connection, you're 90% of the way there. This romantic nail art tutorial will focus on the fundamentals that work for everything from a single accent nail to a full, breathtaking set.
Gathering Your Tools for Success
You don't need a ton of fancy equipment, but using the right tools for this job is non-negotiable. Skimping here will just lead to frustration.
- A High-Quality Liner Brush: This is your most important tool. Look for a thin, striper brush (size 0 or 00) with firm, flexible bristles that come to a precise point. I'm partial to the Winstonia #000 Striper for detail work.
- Highly Pigmented Polish or Gel: You need opacity in one or two strokes. Sheer polishes will make the lines look patchy. For gel, use a good quality art gel. For regular polish, look for formulas labeled as "one-coat" or specifically for nail art.
- A Good Base & Top Coat: A smooth base is crucial. For regular polish, a ridge-filling base coat helps. Always use a quick-dry top coat to seal and protect your delicate lace nails.
- A Dotting Tool or Bobby Pin: For creating the tiny dots that form the starting points and flower centers in your lace design.
- Paper Plate or Palette: For regular polish, pour out a small puddle. This lets your brush load evenly and prevents a goopy mess on your nail.
- Pure Acetone & a Thin Cleanup Brush: Mistakes happen. Having these ready makes clean-up a breeze, keeping your design crisp.
Your Step-by-Step Romantic Lace Nail Art Tutorial
Okay, let's paint. We're going to create a classic scalloped lace border, which looks stunning along the cuticle line or the tip of the nail. Practice on a piece of paper or a fake nail tip first.
Step 1: The Foundation
Apply your base coat and two coats of your chosen background color. Let it dry completely or cure your gel color. This is key—working on a tacky surface will smudge everything. For a truly romantic feel, soft pinks, nude shades, or even a classic red make a beautiful backdrop.
Step 2: Load Your Brush & Create the "Spine"
Dip your liner brush into your polish or gel, then gently wipe one side of the brush on the edge of the bottle or palette. You want a smooth, even load—not a glob. Starting near your cuticle (or wherever you want the lace to live), use a gentle rocking motion to create a slightly wavy, thin line. This is the "spine" of your lace pattern. Don't stress about it being perfectly straight; a little wave adds to the organic, lacey feel.
Step 3: Building the Scallops
This is where the lace magic happens. Along the wavy spine you just created, you'll make a series of connected, C-shaped curves. Place the tip of your brush at the spine, gently curve outward, and then bring the line back to meet the spine a little further down. Think of it like drawing a bunch of connected parentheses: ( ( ( ( ( ). Keep the scallops consistent in size, and make sure each new line starts right where the last one ended. This continuous line is what creates the intricate, woven look of delicate lace nails.
Step 4: Adding the "Lacework" Details
Now you'll fill in the scallops. From the highest point of each scalloped curve, draw a few thin, straight lines radiating back toward the spine. Then, use your dotting tool (or the end of a bobby pin) to add tiny dots at the intersections and along the lines. This mimics the open, web-like texture of real lace. Less is more here—you can always add another dot, but taking one away is messy.
Step 5: The Final Flourishes & Sealing
Once you're happy with the pattern, let it dry or cure completely. This is critical! Then, apply a generous layer of your favorite top coat. I recommend a thicker, self-leveling top coat like Seche Vite for regular polish to protect all those delicate details. And voilà! You've just created a stunning piece of romantic nail art.
Pro Tips to Avoid a Craft Disaster
- Polish Consistency is Everything: If your polish is too thick, add a single drop of nail polish thinner (NOT remover). For gel art paint, you can thin it slightly with a tiny bit of alcohol or gel cleanser on your brush.
- Anchor Your Hand: Rest your painting hand's pinky on the table for stability. For the hand you're painting, rest it palm-down on your lap or a pillow to minimize shaking.
- The "No Wipe" Trick: If using gel, cure a layer of "no wipe" top coat *before* you start your lace design. This gives you a super smooth, non-tacky surface to paint on, and if you make a mistake, you can simply wipe the uncured art gel away with alcohol without ruining your color base.
- Start Simple: Your first attempt doesn't need to be a full 10-nail set. Try a single accent nail with the lace border. Master that, then expand to two nails, then a full pattern. Confidence builds with practice.
Lace Styles to Try Next
Once you've nailed (pun intended) the basic scallop, the world of lace is your oyster.
- Vine Lace: Create a main line and add smaller, branching lines with tiny leaf-like dots.
- Geometric Lace: Use your liner brush to create tiny, connected diamonds or squares.
- Lace Flowers: Use your dotting tool to make five dots in a circle, then connect them with your liner brush to form a simple flower. Scatter these around a lace border for extra romance.
FAQ: Your Lace Nail Art Questions, Answered
- Q: Can I do this with regular polish, or do I need gel?
A: You can absolutely use regular polish! The key is using a highly pigmented formula and working fairly quickly. Gel is more forgiving because it doesn't dry until you cure it, giving you unlimited time to perfect the design. - Q: My lines are shaky. How can I fix that?
A: Focus on moving your whole arm from the elbow or shoulder, not just your fingers. Also, ensure you're not overloaded with product—a heavy brush is harder to control. Practice drawing straight lines and scallops on paper to build muscle memory. - Q: How do I clean up smudges?
A: For regular polish, dip your cleanup brush in pure acetone, wipe off the excess on a paper towel, and gently trace around your design to sharpen edges. For gel, wipe away uncured mistakes with a lint-free wipe and alcohol. If you've already cured a mistake, you'll need to carefully file or buff it off. - Q: What are the best color combinations?
A: Classic black lace over a nude or blush pink base is timeless. White lace over a soft blue or lavender is incredibly romantic. For drama, try metallic gold or silver lace over a deep jewel tone like emerald or burgundy.
Don't let the final photo intimidate you. Every intricate lace design is just a collection of simple steps you've now learned. Grab your liner brush, put on some good music, and give it a try. The worst that can happen is you take it off and try again—pretty low stakes for such a gorgeous reward. Now go create something beautiful.