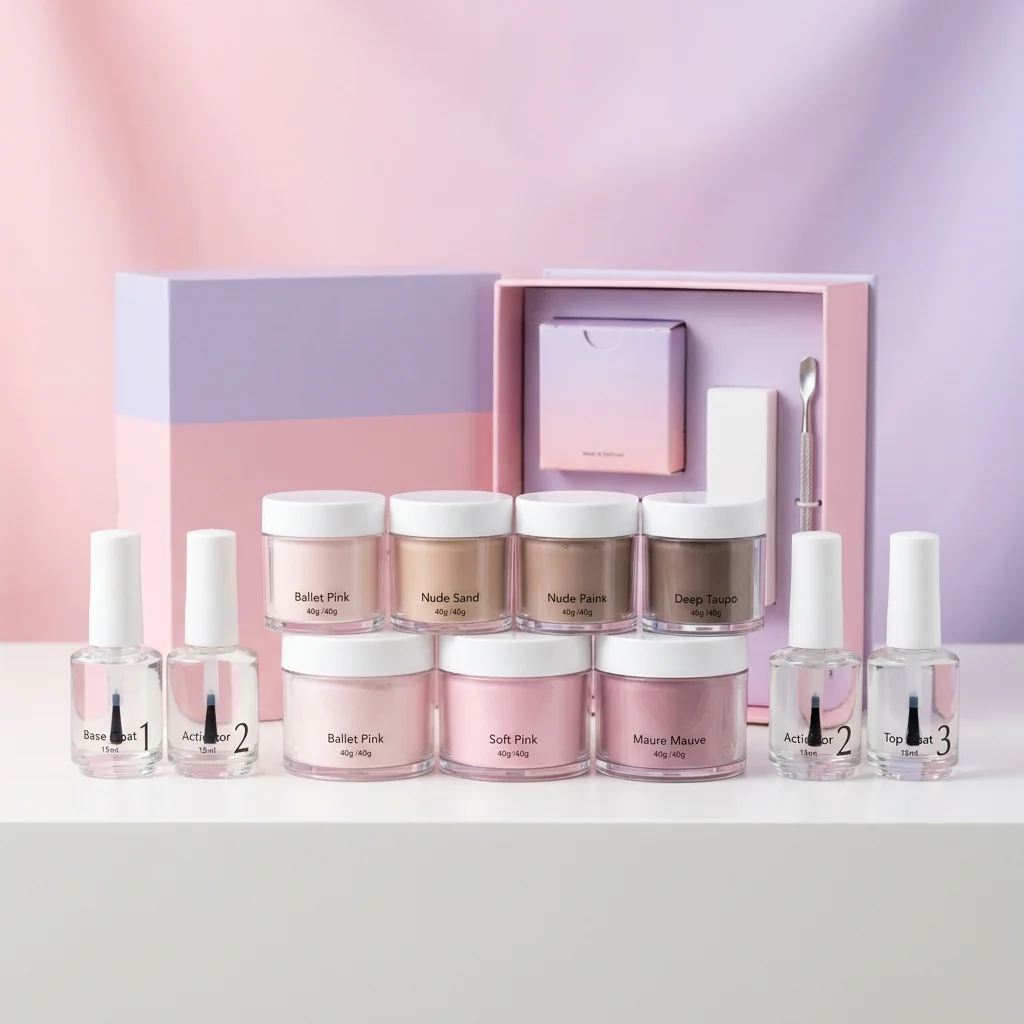
If you've ever stood in the nail aisle wondering whether to grab a dip powder starter kit or a gel polish set, you're not alone. I get asked this question at least three times a week in the salon. So I decided to put both techniques through a serious head-to-head challenge — a full three-week wear test on my own hands. One hand got dip powder using the AZUREBEAUTY Nude Dip Powder Starter Kit, the other got gel polish with the Beetles Gel Polish Starter Set. Same prep, same daily life, same dishes, same typing marathons. Here's exactly what happened, and more importantly, what it means for your nails.
Why I Did This Test
Both dip powder and gel polish have exploded in popularity over the last few years. Salons offer both. At-home kits are everywhere on Amazon. But most of the comparisons I've seen online are surface-level — "gel is shiny, dip lasts longer." That doesn't actually help you decide. You need to know how they hold up washing dishes every night, how they look on day ten versus day twenty, and whether your natural nails are screaming for mercy when you finally take them off.
So I committed. Three full weeks. No shortcuts. I documented everything from start to finish, and I'm sharing all of it here alongside the video walkthrough if you want to see the real-time results up close.
What Exactly Is Dip Powder vs. Gel Polish?
Before we get into the test results, let's clear up what these two products actually are, because I still meet clients who confuse them.
Dip Powder
Dip powder uses a combination of a resin-based adhesive (sometimes called a "dip base" or "bonder") and finely milled colored powder. You paint on the adhesive, literally dip your nail into the jar of powder, tap off the excess, and repeat. Then you seal it with an activator that hardens everything into a rigid, acrylic-like shell. The AZUREBEAUTY kit I used comes with four nude shades, a base coat, activator, and top coat — pretty much everything you need out of the box. There's no UV lamp required, which is a big selling point for a lot of people.
Gel Polish
Gel polish is a hybrid between traditional nail polish and hard gel. It goes on like regular polish — thin coats, nice brush, smooth self-leveling — but each layer cures under a UV or LED lamp in 30 to 60 seconds. The Beetles Gel Polish Starter Set includes a mini LED lamp, base coat, top coat, and a few popular shades. The finish is glossy and flexible, sitting somewhere between a regular manicure and a full gel extension in terms of rigidity.
Step-by-Step Application Comparison
Prep Work
Proper prep is non-negotiable for both methods. I pushed back cuticles, lightly buffed the nail surface with a 180-grit file, cleaned with alcohol, and applied a dehydrator. For dip, you also want to make sure there's zero moisture on the nail plate — the resin bonds to keratin, and water is its enemy. For gel, a good pH bonder helps adhesion but it's slightly more forgiving on slightly imperfect prep. I'd say prep difficulty is roughly equal, though dip powder punishes sloppy prep faster.
Application Time
This is where things get interesting. Here's how the timing broke down for a full set of ten nails:
| Step | Dip Powder (AZUREBEAUTY) | Gel Polish (Beetles) |
|---|---|---|
| Base/dip coats (color) | ~18 minutes (3 dips with drying between) | ~10 minutes (2 coats, each 60s LED cure) |
| Activator / top coat | ~5 minutes (activator + buff + top coat) | ~2 minutes (top coat, 60s cure) |
| Total application time | ~28 minutes | ~15 minutes |
Gel polish was noticeably faster. The dip process requires you to wait for each layer of adhesive to get slightly tacky before dipping, then shake off loose powder, then repeat. It's not hard, but it's more steps. With gel, I just painted, cured under the Beetles lamp, painted again, cured again, done. If you're someone who gets fidgety during manicures, gel wins here.
Finish and Look
Right out of the gate, both looked gorgeous. The AZUREBEAUTY nude shades gave a really natural, soft look — almost like a "your nails but better" vibe. The Beetles gel had a bit more of a high-gloss, salon-quality shine. One thing I noticed with dip is that the surface can look a little uneven if you don't buff and seal carefully. I spent an extra two minutes buffing each nail smooth before applying the top coat. With gel, the self-leveling formula does most of the work for you.
The 3-Week Wear Test: What Actually Happened
Here's where I got nerdy. I checked my nails every single day and logged any changes. Let me walk you through the timeline.
Week 1 (Days 1–7)
Both hands looked fantastic. No chips, no cracks, no lifting on either technique. The gel polish maintained that wet, glassy shine. The dip powder looked just as good as day one, maybe even slightly better because the top coat had fully cured by day two or three. I did dishes, typed all day, opened cans — normal life stuff. Both held up beautifully.
Week 2 (Days 8–14)
This is where I started to see differences. On the gel polish hand, I noticed the tiniest bit of tip wear by day nine. Just the very edge of my index and middle fingers lost a sliver of color. Honestly, nobody would notice unless I pointed it out. By day twelve, there was minor lifting along the cuticle line on my ring finger — probably two millimeters of separation. Not terrible, but it was there.
On the dip powder hand? Nothing. The shell that dip creates is genuinely tough. It's rigid, almost like a thin acrylic overlay. No tip wear, no lifting, no chips. I was honestly surprised by how intact everything looked heading into week three.
Week 3 (Days 15–21)
By the final stretch, the gel polish was showing its age. I had visible tip wear on four nails, and the cuticle lift on my ring finger had grown to about four millimeters. The shine had dulled somewhat, though a quick swipe of cuticle oil brought some of it back. Still, the gel polish looked like a two-week-old manicure — lived-in but not embarrassing.
The dip powder was still going strong. I had one tiny chip on my thumb by day eighteen — I caught it on a cardboard box — but otherwise it looked nearly perfect. The rigidity that made it so durable is also what caused that chip: dip doesn't flex, so when it does fail, it fails by cracking or popping off rather than slowly wearing down. But honestly, at day eighteen, that's impressive.
| Durability Factor | Dip Powder | Gel Polish |
|---|---|---|
| Chipping | Minimal (1 small chip, day 18) | Moderate (tip wear from day 9) |
| Cracking | None | None |
| Lifting | None through week 3 | Minor cuticle lift starting day 12 |
| Overall durability score | 9/10 | 7/10 |
Pros and Cons
Dip Powder — What I Liked
- Insanely durable. Three full weeks with barely any damage is wild for an at-home product.
- No UV lamp needed — great if you're concerned about UV exposure on your hands.
- The AZUREBEAUTY kit has beautiful, buildable nude shades. Sheer with two dips, opaque with three.
- The acrylic-like hardness gives nails extra strength. If you have weak or bendy nails, this is protective.
- Color stays true. No fading or yellowing over the three weeks.
Dip Powder — What Bugged Me
- The dipping process is messy. Powder gets everywhere, even if you're careful.
- Application took almost twice as long as gel.
- If you get the activator-to-base-coat ratio wrong, you can end up with a lumpy surface that needs serious buffing.
- Removal is a grind — literally. More on that below.
- Shared dip jars aren't the most hygienic if you're doing nails with friends (pour-over method is better).
Gel Polish — What I Liked
- Fast and intuitive. If you can paint your nails, you can do gel polish.
- The Beetles lamp is small but effective — full cure in 60 seconds per coat.
- Beautiful high-gloss finish that rivals any salon gel manicure.
- Flexibility means it moves with your natural nail, so less risk of painful cracks.
- Easier and gentler removal compared to dip powder.
Gel Polish — What Bugged Me
- Didn't last as long as dip. The two-week mark was its realistic limit for a clean look.
- Tip wear showed up early and there's no real fix besides a full redo.
- The LED lamp is small — I had to cure my thumbs separately, which added time.
- Some people develop sensitivity to gel acrylates over time. Worth knowing.
- Cuticle lifting can let water in, which is a recipe for greenies if you're not careful.
The Removal Process
This matters a lot. A gorgeous manicure means nothing if taking it off destroys your natural nails.
Dip Powder Removal
Here's what I did: I filed off the shiny top coat with a coarse file, then soaked cotton balls in pure acetone, placed them on each nail, and wrapped with foil. Waited fifteen minutes. Scraped off the softened product with a cuticle pusher. Some spots needed a second soak. Total removal time was about 25–30 minutes. My nails felt slightly dry afterward, and there was a thin layer of residue that needed gentle buffing.
Gel Polish Removal
Same basic method — file the top coat, acetone soak with foil wraps. But here's the difference: gel polish broke down much faster. After about 10–12 minutes, the product was crumbling off easily. Less scraping, less soaking, less time my nails were marinating in acetone. My nails felt dry too, but less "stripped" than the dip hand.
| Removal Factor | Dip Powder | Gel Polish |
|---|---|---|
| Soak time | 15–20 minutes | 10–12 minutes |
| Difficulty | Moderate (more product to break down) | Easy (softens quickly) |
| Nail condition after | Dry, thin residue, slight roughness | Dry but smoother overall |
Whatever you do, do not peel or pry either product off. I know it's tempting. You will rip off layers of your natural nail plate. I've seen it happen to clients and it takes months to grow out the damage.
Keeping Your Natural Nails Healthy After Removal
This is the part most guides skip, and it's the part that matters most to me as a technician. Whether you go dip or gel, here's what I recommend post-removal:
- Hydrate immediately. Slather on cuticle oil (I like CND SolarOil or jojoba oil) and a rich hand cream right after removal. Do this for at least three days straight, multiple times a day.
- Give your nails a break. I know it's hard, but try to go product-free for 3–5 days between manicures. Your nail plate needs to rehydrate and rebalance its natural oils.
- Buff gently, don't aggressively file. If there's residue left, use a fine 240-grit buffer — not a coarse file. You're trying to smooth, not thin.
- Use a nail strengthener. OPI Nail Envy or Essie's Treat Love & Color can help reinforce nails that feel weak after removal.
- Avoid hot water for a few hours. Freshly stripped nails absorb water quickly, which makes them soft and prone to peeling.
- Eat your biotin. Okay, this one's a longer play, but biotin-rich foods (eggs, nuts, sweet potatoes) or a supplement genuinely support nail growth and strength over time.
Best for
Dip powder is ideal if you want maximum durability, have weak or bendy nails that need structural support, or you're rough on your hands and need your manicure to survive real life for three weeks. The AZUREBEAUTY kit is a solid budget-friendly option for getting started at home.
Gel polish is perfect if you love switching colors frequently, want a quick and easy application, prefer a more natural-looking flexibility on your nails, or you're new to at-home nail enhancements. The Beetles kit with its included LED lamp makes the learning curve pretty gentle.
Skip if
Dip powder isn't great for you if you have very thin, damaged nails (the removal process can be harsh), you're impatient with multi-step applications, or you want to change your color every week.
Gel polish might let you down if you need your manicure to last beyond two weeks without any visible wear, or if your nails are naturally oily and you struggle with lifting — dip's stronger adhesion might serve you better there.
Tips for Success
Whether you go dip or gel, these tips will help you get the best possible results at home:
- Thin coats are everything. With dip, wipe the brush on the bottle edge before applying base — too much liquid causes clumping and uneven surfaces. With gel, one thin coat cures better than one thick, gloopy one.
- Cap your free edge. Paint or dip over the very tip of each nail. This seals the edge and is the single biggest thing you can do to prevent early chipping and lifting on both methods.
- Keep your cuticle area clean. Any product touching living skin will lift. Use a small brush dipped in acetone to clean up the perimeter before curing or activating.
- Don't skip the top coat. It's not just for shine — it protects the color layer from UV fading, staining, and wear.
- Store dip powder jars upright and sealed. Moisture is dip powder's enemy. A clumpy jar means a lumpy manicure.
- Replace your LED lamp bulbs annually. A weak lamp means undercured gel, which means lifting and potential allergic reactions. The Beetles lamp is affordable enough to replace if needed.
- Invest in good acetone. Not all acetone is equal. Pure, 100% acetone (like Onyx Professional) works dramatically faster than "nail polish remover" with acetone — those are diluted and will double your soak time.
Frequently Asked Questions
Is dip powder actually safe for your nails?
Yes, when applied and removed correctly. The main risk with dip powder isn't the product itself — it's aggressive filing during prep or removal that thins the nail plate. The AZUREBEAUTY formula is 10-free, meaning it's formulated without the most concerning chemicals. That said, some people are sensitive to the cyanoacrylate in dip base, so if you notice redness or irritation, stop using it.
Can I use a gel top coat over dip powder?
Absolutely, and honestly I sometimes do. After activating and buffing your dip powder, you can apply a gel top coat and cure it under your LED lamp for an even glossier, harder finish. Just make sure the surface is clean and buffed so the gel adheres properly.
Why does gel polish sometimes peel off in sheets?
That's almost always a prep issue. If the nail surface is too smooth, too oily, or if you got gel on your cuticles during application, the product has nothing to grip. Try roughing up the surface a bit more with your buffer and using a dehydrator or pH bonder before your base coat. Also, make sure you're curing long enough — undercured gel is a huge culprit.
How many times can I reuse a dip powder jar?
A standard 1oz jar like the ones in the AZUREBEAUTY kit will give you roughly 15–20 full manicures depending on nail length and how many layers you dip. The powder itself doesn't expire quickly, but if it gets contaminated with base coat drips or moisture, it'll get chunky. I always recommend the pour-over method for hygiene — pour powder over the nail instead of dipping directly into the jar.
Does UV exposure from gel lamps really cause skin damage?
The exposure is very brief — we're talking about 60 seconds per coat, so maybe 4–5 minutes total per manicure. Studies suggest the UV dose is quite low, lower than a few minutes of direct sunlight. That said, if it worries you, applying SPF 30+ to your hands before curing or using LED lamps (which emit less UV than traditional UV lamps) gives peace of mind. The Beetles kit uses an LED lamp, which I prefer.
So there you have it — the full breakdown, straight from my own two hands. Honestly, I don't think one is universally "better" than the other. Dip powder won the durability contest hands down, no question. But gel polish was faster, more forgiving to apply, and easier to remove. If you're the kind of person who picks one color and commits for a few weeks, dip is your move. If you like switching things up and want a quicker, more flexible mani, gel polish delivers. I keep both kits in my personal collection and reach for each depending on what my week looks like. Whichever you choose, just remember — prep well, cap those edges, and for the love of your nails, never peel anything off. Happy painting!