
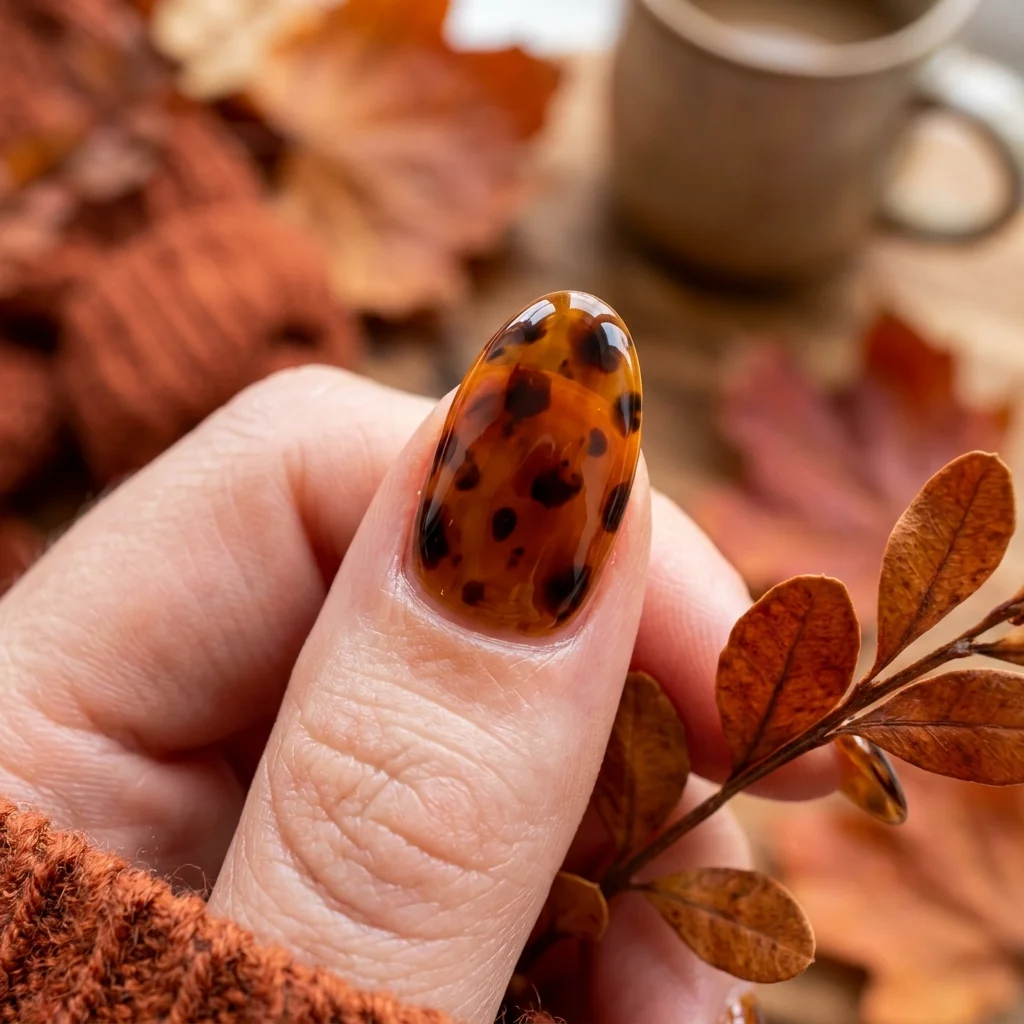
Tortoiseshell Nails Step-by-Step: Recreate the Classic Fall Look
There's something about tortoiseshell nails that just screams cozy autumn vibes. It's a classic, sophisticated look that pairs perfectly with chunky knits, pumpkin spice lattes, and crisp air. I get asked for this design constantly when the leaves start to turn. The best part? It's way easier to achieve than it looks, and you don't need a million colors to do it.
I'm going to break down my exact tortoiseshell nails step-by-step process. We're going for that deep, glass-like, almost 3D effect—not just a splotchy mess. The secret is all in the layering and the products you choose. Grab your tools, and let's get started.
What You'll Need: The Essential Toolkit
Having the right supplies makes all the difference between a frustrating DIY attempt and a salon-worthy set. Here’s what I keep on my station for this design.
The Core Products
- Amber/Orange Jelly Gel Polish: This is the star of the show. A true jelly formula (sheer, buildable, with a high-gloss finish) is non-negotiable. It creates that translucent depth that makes the look realistic. I swear by the amber jelly from LeChat's "Dare to Wear" collection.
- Dark Brown or Black Gel Polish: You'll use this for the "spots." A highly pigmented dark brown gives a softer, more organic feel than pure black. Both work, so it's a matter of preference.
- Clear Builder Gel or Thick Top Coat: This is our secret weapon for dimension. We'll be layering it between colors to create that suspended-in-glass effect.
- Base Coat and Top Coat: Your standard prep and finish products. A non-wipe top coat is ideal for a flawless, high-gloss end result.
Tools & Extras
- Detail Brush or Dotting Tool: A thin liner brush (like a 5mm or 7mm) gives you the most control for painting the irregular spots. A dotting tool works in a pinch but can look less organic.
- Lint-Free Wipes & Isopropyl Alcohol: For cleaning your brush between color swipes. This keeps your lines crisp.
- Small Art Palette or Foil: To dispense your dark polish onto for easy brush loading.
My Tortoiseshell Nails Step-by-Step Tutorial
Ready to create some magic? Follow along closely. The key here is patience with the layers. We're building up color, not slapping it on.
Step 1: The Perfect Prep
I can't stress this enough: a long-lasting design starts with proper nail prep. Shape your nails, gently push back your cuticles, and lightly buff the nail surface. Wipe away any dust with an alcohol wipe. Apply your base coat and cure it fully under your LED/UV lamp. This gives us a clean, smooth canvas.
Step 2: Build the Amber Foundation
Now, the fun begins. Apply your first thin coat of the amber jelly gel. It will look very sheer—that's exactly what we want. Cure it. Apply a second coat. You'll see a beautiful, warm, translucent color start to emerge. For a deeper, richer tortoise, you can do a third coat. I usually stop at two. Cure each layer completely.
Step 3: Create the Dimension (The Magic Step!)
Here’s where we get that incredible depth. Take a small amount of your clear builder gel or thick top coat. Apply a very thin, even layer over the entire nail. Do not cure it yet. This wet, clear layer is what our dark spots will sink into, creating that layered, 3D effect.
Step 4: Paint the Tortoiseshell Pattern
Working one nail at a time (so the clear gel stays tacky), load your detail brush with the dark brown gel. On your palette, wipe off any excess to avoid flooding the nail.
Now, imagine the pattern. Tortoiseshell isn't random splotches; it's clusters of irregular, rounded shapes that don't touch the cuticle or sidewalls. Start with larger "blobs" in the center of the nail. Then, fill in around them with smaller, irregular dots and curved lines. Let the dark color settle into that wet clear layer. It will softly spread and blend at the edges, giving you that organic look.
Pro Tip: Don't overwork it. Less is more. You can always add another tiny spot, but you can't take one away. Once you're happy, cure this layer immediately.
Step 5: Seal and Finish
You should now have a stunning, multi-dimensional tortoiseshell effect! To lock everything in and amplify the gloss, apply one final, generous coat of your non-wipe top coat. Cap the free edge to prevent chipping, and give it a final, full cure under the lamp.
And there you have it! A flawless, salon-quality tortoiseshell manicure.
Pro Tips & Troubleshooting
Even with the best steps, a few tips can help you perfect the technique.
- Color Too Flat? You probably skipped the "wet clear gel" layer in Step 3. That layer is crucial for the suspended, glass-like effect. Don't omit it!
- Pattern Looks Messy? Your dark polish might have been too thick. Always wipe your brush well. Also, ensure your clear gel layer isn't too thick—it should be thin and tacky, not a goopy puddle.
- Want a Bolder Look? You can mix a tiny drop of your dark brown into your amber jelly on a palette before the first application to create a deeper, more unified base tone.
- Short Nails? This look is stunning on shorter nails! Just scale down your "spots" to fit the nail bed. Avoid placing spots too close to the edges.
Frequently Asked Questions
Can I do tortoiseshell nails with regular nail polish?
Absolutely, but the process and result will differ. You won't get the same glassy, cured depth. I recommend using a sheer, orangey-brown polish for the base, letting each coat dry completely, and using a detail brush for the spots with a dark polish. A good, thick top coat will help smooth it all out, but it won't have that gel "suspended" effect.
How do I clean my detail brush after using gel?
This is important! Gel polish cures with light, so you can't let it dry on your brush. I wipe my brush on a lint-free wipe soaked in isopropyl alcohol after every few strokes to keep it clean and prevent clumping. When you're done, give it a thorough wipe and reshape the bristles.
What colors can I use for a non-traditional tortoiseshell?
Get creative! I've done "frostbite" tortoise with a icy blue jelly base and navy spots, and a "jewel-toned" version with a deep green jelly and black spots. The technique stays the same; just swap the color palette to match your outfit or mood.
My clear gel layer got too thick. How do I fix it?
If it's still uncured, you can wipe it off with alcohol and start that step over. If you've already cured it, you can still proceed, but you might need to use a slightly thicker layer of dark polish to get the same visual effect. Next time, remember: thin is in!
