
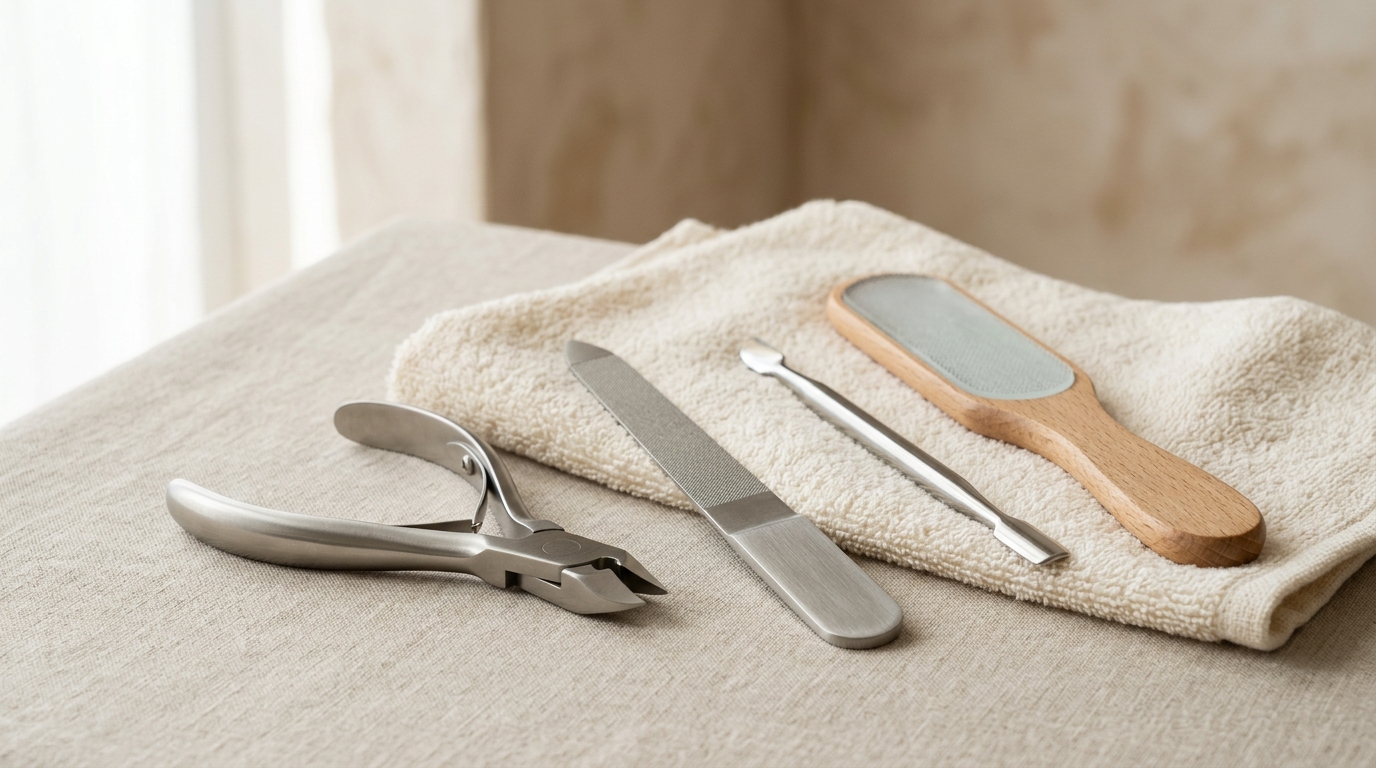
A well-chosen manual tool kit can make routine toenail maintenance more polished and less awkward. Here’s how to shop for clippers and files that suit a fully visible natural nail edge, plus the setup details that make the finish look cleaner.
What “thick toenail” means when you’re shopping
“Thick” gets used loosely in beauty aisles. Sometimes it means a standard toenail clipper feels too narrow at the opening. Sometimes it means the nail has a broad free edge and a compact clipper is difficult to place. And sometimes the issue is less about the nail itself than the ritual: dim bathroom light, an uncomfortable chair, a file that has gone fuzzy, or a lever that slips in the hand.
That distinction matters because the answer is not automatically a more aggressive-looking tool. A larger jaw may be useful if it creates enough room for the visible edge to sit naturally between the blades. It is less useful if its size makes the clipper cumbersome. Likewise, a long handle or spring mechanism may change the feel of the closing action, but only a tool that moves smoothly and predictably belongs in a personal kit.
Think of the goal as a neat, wearable edge rather than the shortest possible nail. A mostly straight silhouette, softened lightly at the corners, tends to look tidy in sandals and feels easier to maintain between pedicures. Clippers establish length; files refine the finish. Both earn a place in the drawer.
Manual pedicure tools at a glance
These are the five tool categories worth considering for routine cosmetic maintenance. The right choice depends on the shape of the visible edge, the way the handle sits in your hand, and whether the tool allows clear placement without awkward reaching.
| Tool | Design and control considerations | Cosmetic role | Use note |
|---|---|---|---|
| Straight-edge toenail clipper | A flatter cutting edge supports a mostly straight trim. Look for jaws that meet evenly and an opening that fits the visible free edge without crowding it. | Everyday length maintenance for nails that fit comfortably in a conventional toenail clipper. | A broad lever or lightly textured handle can make placement easier. Trim in a series of modest closures rather than one sweeping cut. |
| Wide-jaw clipper | The wider opening gives a broader nail edge more room between the cutting surfaces. Lever resistance and overall weight vary considerably. | A useful alternative when a standard clipper feels too narrow for the visible free edge. | More space is the benefit; extra pressure is not. If the action catches or the tool feels unwieldy, set it aside. |
| Nail nipper | Nipper-style jaws and spring-action handles offer a different hand position from a lever clipper. Shapes range from broad and blunt to narrow and pointed. | An option for a plainly visible edge when a nipper’s handle style feels more natural than a clipper. | Choose blunt, well-aligned jaws intended for nail trimming. This is not a tool for corners, sidewalls, or work beneath the nail. |
| Glass or etched file | A rigid etched surface gives the edge a precise finish and can be rinsed and dried after use. Check the file carefully for chips or cracks. | Smoothing a freshly trimmed free edge and refining minor unevenness. | Best for finishing rather than dramatically changing length. Use gentle passes along the edge and replace a damaged file. |
| Disposable emery board | Available in varied textures and thicknesses, from flexible cushioned boards to firmer styles. The abrasive surface wears down over time. | Routine smoothing and quick touch-ups, especially for anyone who prefers a replaceable personal-use file. | Choose a finer board for finishing. Discard it when the surface frays, softens, sheds, or no longer works cleanly. |
The details that matter more than “heavy-duty” labeling
Marketing language can be vague, particularly around toenail tools. “Professional,” “strong,” and “extra tough” say little about the things that affect a home manicure or pedicure: jaw placement, handle shape, blade alignment, and whether you can see the edge while using the tool. A few practical features are more revealing.
Jaw opening and blade shape
Before using a clipper, open it and look at the space between the blades. The visible free edge should fit without being bent, squeezed, or pushed into an angle. A straight-edge clipper is a natural starting point because its profile complements a mostly straight trim. If that opening feels cramped, a wide-jaw version may offer a better fit.
Inspect how the cutting edges meet when the tool is closed. They should align neatly, without an obvious gap, sideways shift, or snagging movement. A clipper with misaligned blades can leave a ragged edge that then requires unnecessary filing. No amount of attractive packaging compensates for a tool that closes unevenly.
Handle feel and closing action
Handle design is personal. Some people like a familiar folding lever; others prefer the spring action of a nipper. Either can work for cosmetic trimming when it rests comfortably in the hand and the motion is easy to anticipate. A broad lever, a subtle contour, or a matte finish can be more useful than a highly polished all-metal surface that rotates when held.
A tool does not need to feel powerful to be worthwhile. In fact, a very abrupt closing motion can make routine grooming feel less precise. Open and close the implement away from the nail first. You are looking for a clean, even action—not stiffness, sticking, wobble, or a sudden snap.
How much of the edge you can see
The body of a clipper should not obscure the area you are trimming. This is one reason compact-looking tools are not always automatically better: the profile needs to leave enough of the nail in view. Direct light is equally helpful. A lamp aimed from the side or front often gives the free edge clearer definition than an overhead bathroom fixture alone.
File surface and shape
Files are finishing tools, but their surfaces are not interchangeable. A glass or etched file has a firm, uniform feel and works beautifully for careful edge refinement. An emery board is easy to replace and comes in many textures, which makes it a practical choice for a personal at-home kit. Coarser surfaces are best reserved for limited smoothing of an uneven free edge; finer surfaces create the final soft finish.
Grit labels are not standardized across every brand, so the label alone cannot tell you exactly how a file will feel. Look at the surface, use a light hand, and retire any board with lifting abrasive layers or any glass file with damage along its edge.
Build a small kit that earns its drawer space
A thoughtful pedicure kit does not need every implement sold in a zippered case. One dependable clipper or blunt nail nipper, one finishing file, a clean towel, and a dry place to store them cover the cosmetic basics. Fewer pieces also make it easier to keep track of condition and cleanliness.
Skip bundled sets padded with pointed picks, hook-shaped devices, tiny blades, or tools described as “ingrown nail” accessories. Those items do not improve a straightforward grooming routine. The same goes for electric drill kits marketed as a fast route to salon-looking feet. For natural nails at home, a manual cutting tool and file are the more appropriate pairing.
Pass on clippers with loose pivots, rough mechanics, visibly uneven blades, corrosion, or handles that feel insecure. Avoid files with chips, cracks, peeling abrasive layers, or cardboard cores that have softened from repeated exposure to moisture. These are not details to overlook because the tools are inexpensive; they are signs that the item no longer belongs in your kit.
Set up for a cleaner-looking result
Start after normal washing, then dry feet thoroughly, including the areas around the toes and nail edges. There is no need to turn trimming into a soaking ritual. A dry free edge is easier to see, and dry tools are less likely to slip in the hand.
Choose a chair that lets you bring one foot into view without balancing, twisting, or stretching. Put a clean towel beneath the foot to catch clippings and protect the floor. If close work is easier with reading glasses, wear them. Bright, direct light matters more than a complicated setup; even a simple movable lamp can make the line of the nail easier to follow.
Give the tool a brief inspection before each use. Check that the clipper’s blades meet cleanly and that a nipper’s spring and hinge move without wobbling. The file should have an intact surface. If anything feels off, replace the tool instead of trying to make it serve one more pedicure.
A polished trimming-and-filing sequence
- Work only at the visible free edge. Place the clipper or nipper where the edge is fully in view. Leave the sides and underside of the nail alone.
- Follow a mostly straight line. Use several small trims across the edge, rather than removing the full width in a single closure. A deeply rounded shape is unnecessary for a clean cosmetic finish.
- Leave a little edge for filing. The aim is a manageable length, not an ultra-short one. A small amount of free edge gives the file something to refine.
- Soften the finish with a file. Use a glass file or fresh emery board along the free edge to smooth minor roughness and lightly soften any sharp-looking corner. Keep the file at the edge rather than under the nail.
- Clear the area and look again. Brush clippings onto the towel and inspect the overall line. If the finish needs a touch-up, return to the file rather than making a tiny last-minute clip.
The visual target is straightforward: an even, mostly straight edge that looks neat against the toe and has no obvious snags. This approach also pairs well with polish, bare nails, and the low-maintenance look of a simple at-home pedicure.
For a broader beauty routine around trimming, exfoliation, and polish prep, see our safe at-home pedicure routine. If you are refreshing your full kit, our guide to at-home pedicure tools offers additional basics to consider.
Keep tools clean, dry, and personal
After grooming, remove visible nail debris with a tissue or soft brush. Wash metal tools that are designed to be washed according to the manufacturer’s care instructions, then dry them fully before folding, closing, or storing them. Care directions matter, especially for coated handles, specialty finishes, and spring mechanisms.
Rinse and dry a glass file before putting it away. Treat emery boards as personal-use items and replace them once their surface looks worn or difficult to keep clean. Clippers, nippers, and files should not be shared between household members.
A dry pouch, small case, or drawer divider is better than leaving tools loose near a steamy shower. Storage protects the blades from knocks, keeps files cleaner, and makes worn-out pieces easier to spot. A short, well-maintained collection is more useful than a crowded kit full of neglected extras.
When the setup itself is the issue
Sometimes the limiting factor is reach, not the tool. Hand weakness, tremor, reduced vision, balance concerns, or difficulty bringing the foot into a comfortable seated position can make personal grooming impractical. In that situation, arranging assistance from an appropriately qualified professional is a better option than experimenting with floor mirrors, extension handles, precarious stools, or unfamiliar sharp implements.
The same applies if the free edge cannot be seen clearly enough to trim. A beauty routine should fit into your real life and physical comfort; it should not require acrobatics in the bathroom.
Frequently asked questions
How often should I replace a toenail clipper or nipper?
Replace it when the blades no longer meet cleanly, the hinge develops side-to-side movement, the spring becomes unreliable, or the tool shows corrosion or damage. There is no universal calendar schedule; condition is the better guide.
Is a glass file better than an emery board?
They serve the same finishing role with different personalities. A glass or etched file is rigid, reusable, and easy to rinse. An emery board is lightweight, inexpensive to replace, and available in many surface textures. Choose the one you will keep clean and use with a light touch.
What should I do if the edge looks uneven after clipping?
Use a file to refine the visible free edge. Filing is the better cosmetic finishing step for minor roughness than repeatedly returning to the clipper for increasingly tiny corrections.
A practical final edit
For routine cosmetic grooming, the best kit is usually a well-sized manual clipper plus a file you can control comfortably. If the nail is difficult to see, reach, or trim without pressure—or if its appearance has changed—skip the heavy-duty gadget and let a qualified professional decide what belongs near it.