
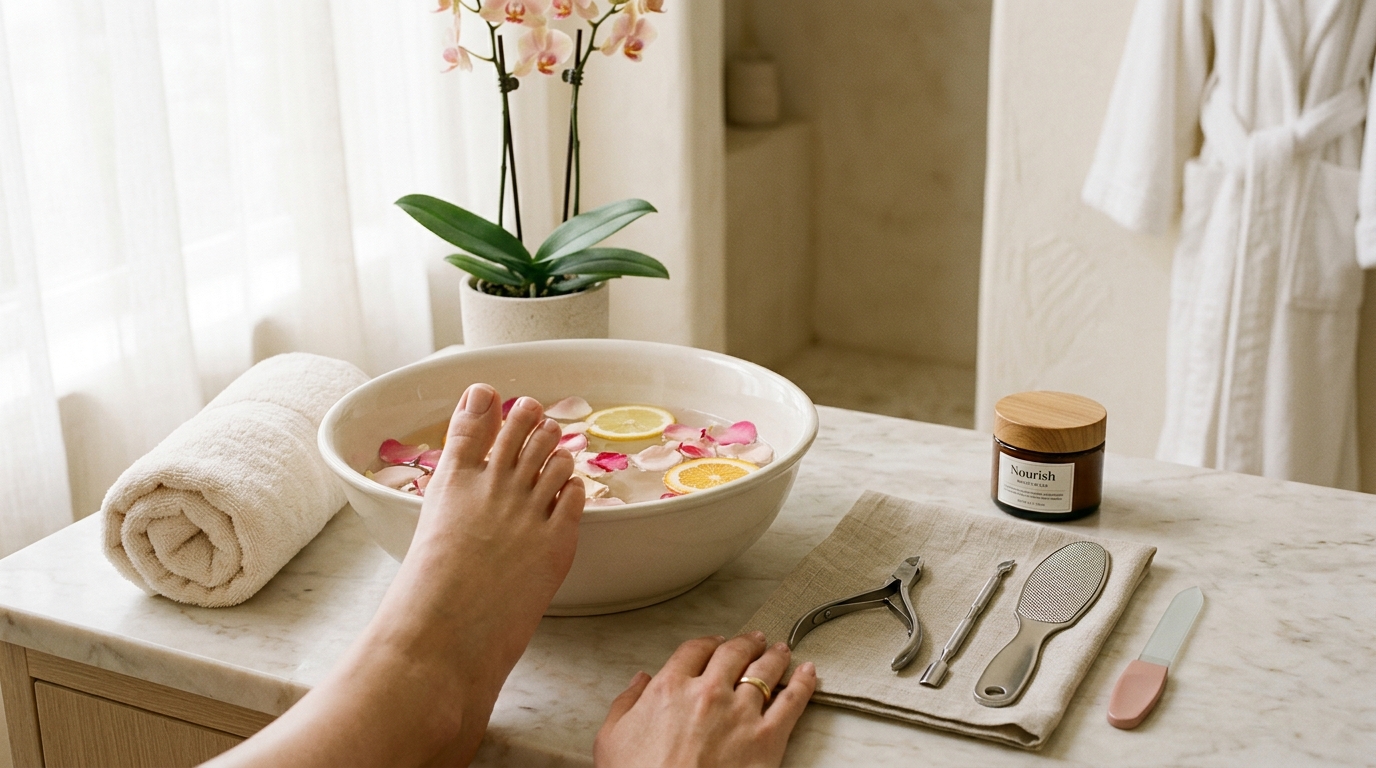
A polished home pedicure is less about recreating a full salon service and more about a calm, clean sequence: tidy the nails, soften rough-looking skin only if you want to, add moisture, and finish with color—or not.
Start With a Realistic Pedicure Goal
The best at-home pedicure is rarely the most elaborate one. It is the version you can do comfortably, with tools you understand and enough time to avoid rushing. For most people, that means washing the feet, shaping the free edge of the nails, lightly refining dry-looking areas if desired, applying cream, and adding polish only after the grooming portion is complete.
Think of it as maintenance, not a mission to erase every bit of texture from your heels or make each toenail identical. Feet carry you through a lot; some unevenness in skin texture and nail shape is ordinary. A good result is simply one that looks neat, feels comfortable, and does not involve forceful filing, digging around nail corners, or using tools that are difficult to control from a seated position.
If you are building a kit, start small. Toenail clippers, a clean file, a personal-use foot file or pumice stone, towels, foot cream, and polish supplies are enough for a polished routine. Our guide to the best at-home pedicure tools breaks down the useful basics without requiring a crowded bathroom cabinet.
Set Up a Clean, Comfortable Station
Choose a stable chair, bright light, and a surface that can hold your supplies without balancing bottles on your lap. Put down a freshly washed towel for your feet and keep another towel nearby for your hands or work surface. This kind of setup is not fussy; it makes it easier to see what you are doing and keep used wipes away from clean tools.
What to gather
- Mild soap, comfortably warm water, and a washcloth; a clean basin is optional
- Two clean towels
- Toenail clippers designed for toenails
- A clean emery board or nail file
- A soft nail brush, if desired
- A personal pumice stone or manual foot file for optional surface smoothing
- Foot cream or lotion
- Cotton pads or lint-free wipes and remover for old polish
- Toe separators, folded tissue, or open-toe sandals for polish application
- Base coat, color, and top coat if you want a painted finish
- A small bin or bag for used wipes and disposable items
Before beginning, wash your hands and take a quick look at your tools. Clippers should open and close smoothly, files should not be visibly grimy or crumbling, and reusable items should be clean and fully dry. Retire anything rusty, cracked, rough-edged, or difficult to clean. A fresh file is an easy upgrade when an old one has lost its texture or picked up residue.
Keep porous tools personal. That includes pumice stones, emery boards, buffers, and foam toe separators. Household members can each have their own, while metal clippers should be cleaned and dried between users. When the pedicure is over, wash reusable tools in a way that suits their material and manufacturer instructions, allow them to dry fully, and store them in a clean container rather than closing them up while damp.
A Quick At-Home Pedicure Workflow
Use this as the order of operations. It keeps grooming steps ahead of polish and gives you a simple place to pause if something feels uncomfortable or looks outside the scope of routine beauty care.
| Stage | What to do | Keep it simple |
|---|---|---|
| Look | Check feet and nails in good light before using tools. | Pause the routine if you notice pain, wounds, bleeding, infection signs, major cracks, altered sensation, or a nail change that concerns you. |
| Clean | Wash with mild soap and comfortably warm water, then dry carefully. | A washcloth works well; soaking is optional rather than required. |
| Shape | Trim the free edge and file away snags. | Make small clips, keep the shape mostly straight across, and do not dig into the sides. |
| Refine | Use a pumice stone or manual file only on superficial roughness, if desired. | Light passes are enough. Skip blades, razors, and strong callus-removal products. |
| Moisturize | Massage cream into heels, soles, and dry-looking areas. | Use less product between toes and keep lotion off nail plates before polish. |
| Finish | Apply clear coat or color to clean, dry nails. | Use thin coats and allow time between layers according to the product directions. |
| Reset | Discard single-use items and wash, dry, and store reusable tools. | Let tools and any basin dry before putting them away. |
Wash First, Then Dry With Care
A regular wash is enough for many at-home pedicures. Use mild soap and comfortably warm water to clean the tops of the feet, soles, heels, and toe areas. A washcloth gives you plenty of control, especially if you are doing a quick maintenance session between polish changes. If you use a soft nail brush, keep the pressure light and use it around the nail surface and free edge rather than scraping under the nail.
A soak can be a pleasant addition, but it is optional. If you choose one, use a freshly cleaned basin and fresh water, and move on when your feet are clean and you are ready to continue. There is no need to turn soaking into the main event, especially if your skin or nails begin to feel overly soft. A shower beforehand can also cover the washing portion of the routine.
Drying deserves more attention than it gets. Pat the feet dry, including the spaces between the toes, before clipping, filing, applying cream, or polishing. This helps keep the rest of the routine orderly: files work more predictably on dry nails, cream does not slide around as much, and polish has a cleaner surface to grip. If you are prone to sensitivity, press the towel against the skin rather than rubbing briskly.
Shape Toenails Without Overworking Them
Trim nails only after they are clean and dry. Use clippers that fit the width and thickness of your toenails, then take off a small amount at a time. The goal is to shorten the free edge—not to take the nail down as far as possible. Several controlled clips tend to look cleaner than one large cut.
A mostly straight-across line is an easy shape to maintain. You can soften the exposed outer edges with a file afterward, but avoid cutting deeply down the sides or trying to excavate a corner. If a nail is thick, difficult to clip, splitting, painful, or shaped in a way that makes ordinary trimming hard, it is better to leave it alone and seek professional assessment than to force the clipper through.
Use a clean file to smooth any sharpness left by clipping. Light, steady strokes are enough; the file is there to refine the edge, not to dramatically reshape the nail. There is also no need to buff the nail plate until it shines. A very gentle pass with a buffer can create a smoother-looking surface before polish, but repeated buffing can leave nails looking thinner or uneven. Save that step for occasions when it truly adds something to your finish.
Handle Rough-Looking Skin Like a Finishing Step
Heels and the balls of the feet often have more texture than the rest of the foot. That does not automatically require removal. If the skin is unbroken and you want a smoother cosmetic look, use a pumice stone or manual foot file with a light touch. Focus on the surface and make a few passes, checking the area as you go. The aim is to soften the appearance of roughness, not to produce an entirely texture-free heel.
Skip any approach that involves cutting, shaving, carving, or using a blade. Razors, credo-style blades, and similar tools can quickly become hard to control. Strong callus-removal products are also better left out of a basic beauty routine. If rough areas are painful, cracked deeply, bleeding, or do not seem appropriate for gentle surface grooming, do not try to escalate with more pressure or more aggressive tools.
Powered devices can be tempting because they promise speed, but they are not necessary for a home pedicure. If you are deciding whether one belongs in your kit, our comparison of an electric foot file versus a pumice stone explains the practical differences. For many people, a manual tool offers the easiest visual control and is plenty for occasional touch-ups.
Moisturize for a Finished Look
Foot cream is what makes a basic pedicure look intentional even if you skip color. Apply it to the heels, soles, tops of the feet, and any dry-looking patches, then massage until the skin feels comfortable rather than heavily coated. A richer cream can feel especially nice on heels; a lighter lotion may be more convenient when you are in a hurry.
Use a lighter hand around the toe area and wipe away excess product that settles between toes. If polish is next, keep cream off the nail plates as much as possible. Oils and lotion residue can make prep messier, so swipe each nail with remover or a clean lint-free wipe before base coat, then let the surface dry. Another easy option is to polish first and save your richer layer of cream for later, once the color has had time to set.
There is no universal schedule for a full pedicure. Some people prefer a quick cream-and-file refresh whenever they notice a snag or dry heel; others reserve the whole ritual for a polish change or sandal season. Let the condition of your nails and your interest in color guide the frequency instead of trying to follow a strict calendar.
Polish Prep and Application
Polish is easiest when all filing, smoothing, and moisturizing decisions are already finished. Remove old color with a cotton pad or lint-free wipe, then make sure each nail is clean and dry. Toe separators can help, but folded tissue works just as well when you only need a little space between toes.
- Apply a thin base coat, following the polish directions.
- Add a thin first coat of color, leaving a narrow margin around the nail edge.
- Apply another thin coat if you want more opacity after the first layer has set.
- Finish with top coat for a glossy, even-looking result.
- Use a small cleanup brush or pointed cotton swab with remover for minor marks on the skin.
Thin layers are generally easier to control than a thick coat that pools near the cuticle. If you do make a smudge, avoid turning it into a major correction project. A small cleanup brush can tidy the edge, and tiny imperfections often disappear once the polish is fully dry. Give yourself the time specified by your products before putting on closed shoes or climbing into bed.
A no-color pedicure counts, too. Clear coat, bare nails, or simply neat nails with moisturized feet can look polished in their own right. If you are looking for finishing extras rather than a long shopping list, browse our spa category.
Questions That May Still Come Up
Should I trim my toenails before or after a shower?
Either can work, but trim when the nails are fully dry. If you shower first, dry your feet and wait until the nail surface no longer feels soft or damp before clipping and filing.
What should I do if the clipper catches or the nail starts to split?
Stop trimming that nail rather than pushing through. Do not pull at a split edge or use the clipper to cut into the sides. A professional can advise on nails that are difficult to trim safely.
Can I paint over peeling polish?
It is worth removing peeling color first. Starting with a clean, dry nail gives you a neater result and makes it easier to see the nail beneath before you apply a new shade.
Conclusion
A good at-home pedicure is a straightforward reset: clean feet, carefully shaped nails, optional light smoothing, comfortable skin, and color only if you want it. Keep the tools clean, skip anything forceful or hard to control, and let a tidy, wearable finish be the goal. That approach makes the routine feel less like a project and more like the kind of low-key beauty maintenance you will actually want to repeat.