
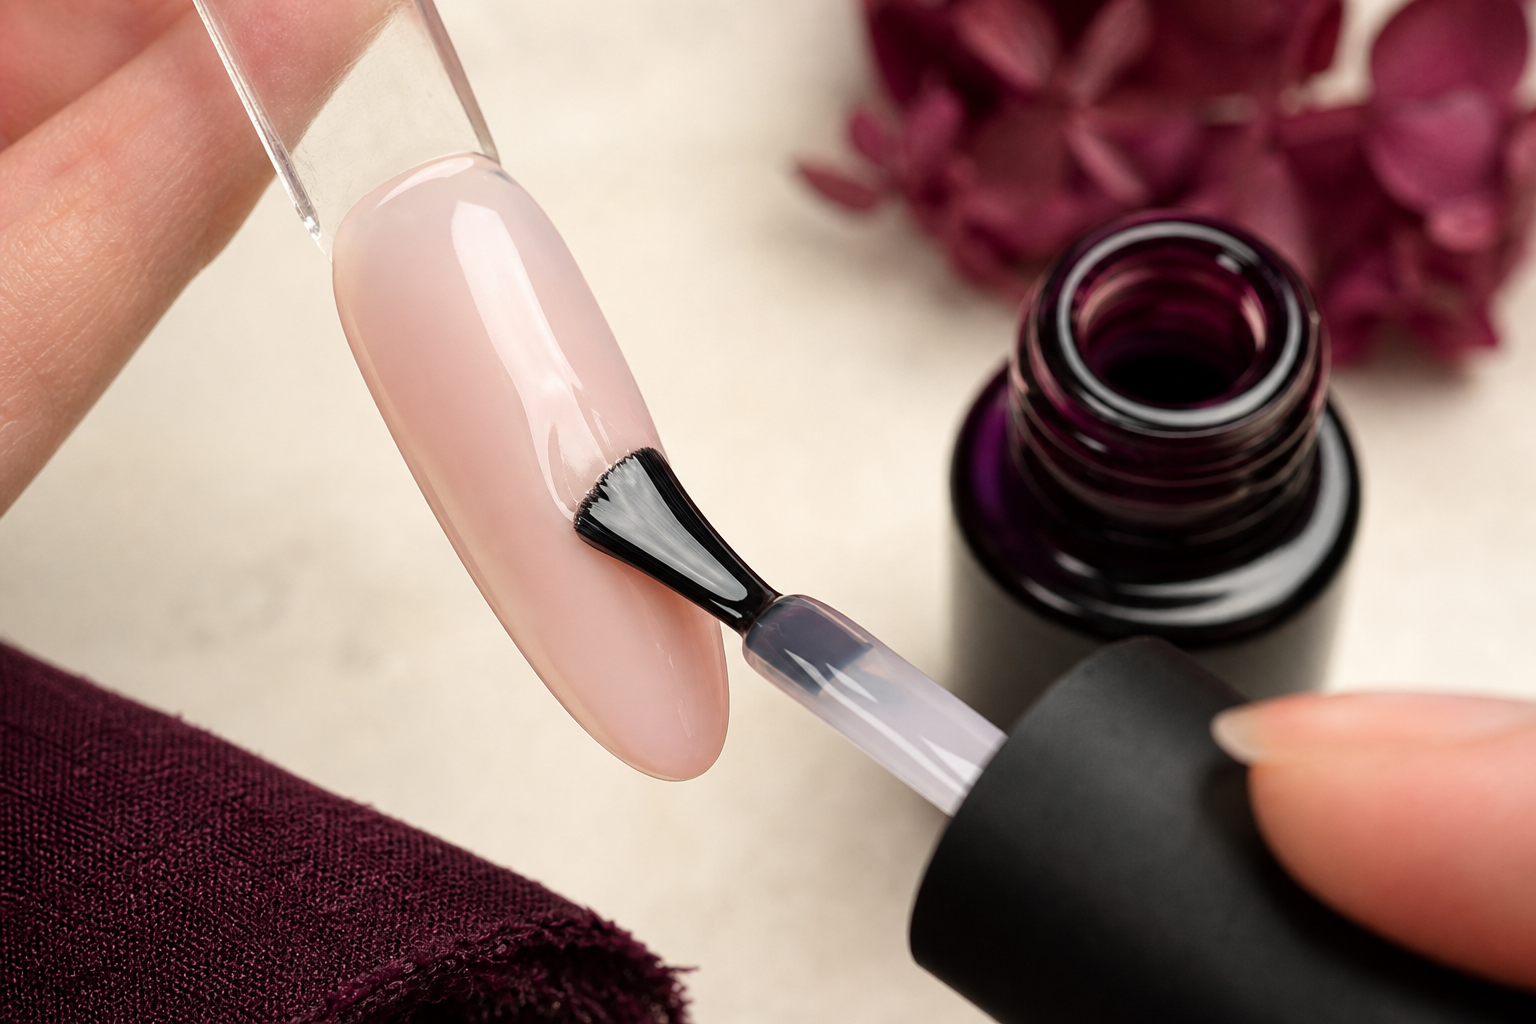
Thin gel-polish coats are one of those techniques that look effortless when they are done well. The color sits close to the cuticle without touching it, the sidewalls look clean, and the surface stays smooth instead of bulky or wavy. The goal is not to chase an invisible measurement of thickness. It is to place a controlled, even film of product that levels neatly, stays off the surrounding skin, and cures according to the directions for the gel system you are using.
Flooding usually starts before the brush reaches the nail: there is too much product on the brush, the first touch is too close to the cuticle, or the hand is angled in a way that lets gel drift into the skin. A few deliberate adjustments can make application feel much more manageable, whether you are working with a sheer neutral, a deep berry, a crisp white, or a high-pigment black.
What a thin gel-polish coat looks like
“Thin” is best judged visually, not by trying to measure a coat. A thin coat looks even from cuticle to free edge, with no obvious ridges, puddles, or swollen-looking borders. The color may be slightly translucent after the first coat, especially with sheer or jelly shades. That is not automatically a problem. Coverage is built through the number of coats and application method specified by the product maker, not by making one layer overly generous.
Look at the nail from more than one angle before curing. A controlled coat should have a soft, consistent reflection across the surface. It should not look like it is climbing the sidewalls, collecting in the cuticle pocket, or forming a thick ledge at the free edge. If the color is more concentrated at the perimeter than through the middle, or if it visibly moves after you stop brushing, there is likely more product on the nail than you need.
A thin coat also leaves visual breathing room around the skin. You can bring gel close to the cuticle for a polished finish, but there should be a clean gap rather than product sitting on the cuticle, proximal nail fold, or lateral skin. That small margin is intentional. It gives you room to control leveling and helps prevent uncured gel from contacting skin.
Do not confuse thin with dry-brushed. A brush that is nearly empty can drag, skip, and leave patchy streaks. The better target is a lightly loaded brush that can glide without depositing a heavy pool.
Set up for steadier application
Before opening the color bottle, make the nail surface ready according to the directions for your selected system. If you are still building a routine, a gel nail starter-kit guide can help you identify the core tools and compatible steps that belong together. Use the prep, base, color, top coat, and lamp guidance provided for the products you have; different formulas and systems can have different instructions.
Good positioning matters as much as the product itself. Rest the working hand on a stable surface, keep the finger you are polishing supported, and turn the finger rather than forcing your brush hand into an awkward angle. A steady, low-pressure hand gives you more control at the cuticle and sidewalls than trying to make fast, floating strokes in midair.
Keep the bottle upright and within easy reach. Wipe excess gel from the bottle neck if the manufacturer’s instructions call for it, and avoid letting product accumulate around the opening where it can transfer back onto the brush. Have the maker-recommended cleanup tools ready before you begin, because any gel that reaches skin needs to be removed promptly before curing following that product maker’s cleanup directions.
Load the brush lightly, then wipe one side
Brush loading sets the pace for the whole coat. Pull the brush from the bottle slowly so you can see how much product is clinging to it. Then wipe one side of the brush against the inside neck of the bottle. This leaves product on the opposite side while reducing the large bead that can run into the cuticle area.
The point is not to strip the brush bare. You want enough gel for a smooth pass across the nail, with a smaller amount reserved for detail work around the perimeter. If a large drop is hanging from the brush, touch it back into the bottle or wipe additional excess from one side before moving to the nail. Starting with too much product makes every later correction harder.
Keep the brush relatively flat to the nail during longer strokes. Pressing the bristles hard splays them and can push gel into the sidewalls. A lighter touch lets the brush guide the gel rather than bulldozing it. If the brush feels stiff, streaky, or difficult to steer, do not compensate by loading more polish; slow down, use fewer passes, and check that the product has been mixed or handled as its directions specify.
Use first-contact placement to protect the cuticle area
Instead of placing the first drop directly at the cuticle, set the brush down a short distance away from it, around the upper third of the nail plate. With very light pressure, nudge the product toward the cuticle until it approaches your chosen clean margin. Then pull the brush smoothly toward the free edge.
This first-contact placement gives you control over where the bulk of the gel lands. When the brush first touches at the cuticle, the product can spread outward before you have a chance to guide it. Beginning slightly lower creates room to move the color upward with the brush tip rather than depositing a puddle at the most delicate edge.
Work one nail at a time if that makes it easier to inspect the perimeter. Before curing, rotate the finger slightly left and right and look straight down the nail. This quick check catches overflow at the sidewalls and cuticle before it becomes a cured edge.
The three-stroke framework is optional, not mandatory
A classic three-stroke framework can be useful when you are learning control: one pass through the center, then one down each side. After the first-contact placement near the cuticle, pull a center stroke to the free edge. Use the remaining product on the brush to guide one stroke along one side, then the other, leaving a narrow buffer away from both sidewalls.
Think of the framework as a map, not a rule that requires exactly three rigid lines. Small nails may need fewer movements. Wider nails may require a small additional pass to blend the surface. The important part is avoiding repetitive back-and-forth brushing, which can move gel toward the skin, create uneven distribution, and make the surface harder to assess.
Control sidewalls and the free edge
Sidewalls are easy to flood because gel naturally follows the path of least resistance. Keep your brush parallel to each side rather than aiming bristles into the skin. Turn the finger slightly toward the side you are polishing so you can see the boundary clearly. Use the very edge of the brush to refine color near the sidewall, then pull toward the tip in one smooth motion.
Do not try to fill every visible sliver along the lateral edge. A tiny, consistent gap is neater than gel touching skin. If one side appears lighter after the first coat, correct coverage with a careful later coat as allowed by the product directions rather than overloading the first layer.
For the free edge, follow the product maker’s instructions. Some systems direct you to wrap or cap the edge; others may not. If your directions support capping, use the leftover product on the brush rather than adding a fresh, heavy bead. Lightly sweep across the edge without coating surrounding skin or creating a thick lip underneath the nail. If the product directions do not call for free-edge application, do not add it as a universal extra step.
A practical sequence for each nail
- Position the finger. Support it on a stable surface and angle it so the cuticle and both sidewalls remain visible.
- Load the brush. Remove it slowly, wipe one side at the bottle neck, and check that there is no oversized bead.
- Place the first contact below the cuticle. Set the brush down slightly away from the cuticle area rather than leading with a heavy deposit at the top of the nail.
- Guide upward, then pull down. Nudge color toward the cuticle margin with a light touch, then draw the gel toward the free edge.
- Refine the sides. Use controlled strokes along each sidewall, maintaining a clean border instead of chasing the skin.
- Inspect before cure. Check the cuticle pocket, lateral edges, and free edge from several angles. If gel has touched skin, remove it promptly before curing using the product maker’s cleanup directions.
- Cure that layer as directed. Cure each layer with the lamp, placement, and cycle specified for the product system. For more on matching process to instructions, see this guide to curing gel polish and the related gel nail lamp guide.
Repeat the color process only as directed for your formula. Resist the urge to add extra product just because the first coat looks lighter than it will after the system’s intended color layers and top coat are complete.
Give thumbs their own plan
Thumbs deserve separate attention because their broad surface and angled position can encourage pooling. Instead of curing all five fingers together if your system does not specifically direct that arrangement, consider working thumbs separately so you can keep them level and watch the sidewalls. Follow the lamp and product instructions for hand placement and curing sequence.
When painting a thumb, rotate it so you can see both sidewalls. The thumb’s curve can hide overflow along the outer edge, particularly when the hand is resting palm-down. Keep the thumb relatively level after application. If it points sharply downward while you move to another finger, gel can migrate toward the cuticle or one side of the nail.
How to handle dark, white, and high-pigment shades
Very dark colors, bright whites, and other opaque shades make application errors more visible. A thick edge can look especially obvious in black, navy, deep red, or white because the color contrast emphasizes every uneven border. These shades reward a smaller brush load, deliberate sidewall work, and a careful inspection before cure.
With a dark color, do not keep brushing simply to make the coat look fully opaque in one pass. The better approach is to apply an even, visually thin layer and use the layer count and curing instructions specified for that product. A white or pastel can look streaky while wet, so focus first on keeping distribution even. If the formula’s directions call for additional color coats, use those rather than building thickness into the first one.
High-pigment colors also benefit from a clean brush edge. If color has collected at the bristle tips, wipe one side again before detail work near the cuticle. Keep the bottle and brush away from strong direct light while working, and follow the brand’s handling guidance.
Catch pooling, wrinkling, and patchiness before they become bigger problems
Pooling is visible movement: gel gathers at the cuticle, sidewall, or tip after the brush leaves the nail. Pause briefly and watch the surface before curing. If the product shifts, use a minimal amount of the maker-recommended cleanup method to remove skin contact, then adjust the gel on the nail only if you can do so without touching skin. A clean redo is often preferable to curing a flooded perimeter.
Wrinkling can appear when the surface is uneven or when a layer is not applied and cured according to its system directions. Do not try to paint over a wrinkled layer as if it were a normal smooth base. Stop, assess the application against the manufacturer’s instructions, and correct the affected material using the system’s recommended process before continuing.
Patchiness is different from pooling. It usually looks like thin-looking spots, streaks, or inconsistent color distribution rather than a raised border. Before adding more gel, ask whether the brush is too dry, the strokes are too forceful, or the shade is designed to build with multiple coats. Properly placed later layers can improve coverage; a thick rescue coat tends to create new problems.
| What you see | Likely application issue | What to do before cure |
|---|---|---|
| Color touches the cuticle or sidewall | The brush carried too much product, first contact was too close to skin, or the finger was tilted. | Remove all skin contact promptly using the product maker’s cleanup directions. Reassess the remaining coat and reapply only if needed; do not cure gel on skin. |
| A bead drifts toward one edge | The coat is too full, the nail is angled, or brushing continued after the gel began to level. | Keep the finger level, lightly redistribute only if possible without spreading product to skin, and inspect again before curing. |
| Color looks streaky or patchy | The brush may be too dry, pressure may be too firm, or the shade may need its intended additional layers. | Leave the coat visually thin and even where possible. Follow product directions for subsequent coats rather than piling on gel. |
| The surface looks wrinkled after curing | The layer may have been applied unevenly or the system directions for product use and curing may not have been followed. | Do not cover it with another heavy coat. Use the manufacturer-recommended correction process, then resume with thinner, controlled layers. |
| Color peels from the tip later | Free-edge handling, prep, product compatibility, or application may need review. | Check the complete routine and product directions. This gel-polish peeling guide can help you troubleshoot common application factors. |
Practice control without turning every set into a rescue mission
Practice with a lighter, more forgiving shade first if you are learning the movement. Focus on one skill at a time: loading the brush, leaving a cuticle margin, or making one clean sidewall pass. Trying to perfect opacity, shape, speed, and perimeter detail all at once can lead to over-brushing.
It can also help to pause between nails and compare them before curing. Look for recurring patterns. If the same sidewall floods repeatedly, adjust finger angle. If every nail gets bulky near the tip, use less product on the initial brush load. If the cuticle area is consistently too far away, practice the gentle upward nudge from a lower first-contact point.
Keep the process calm. Gel polish is easier to control when you give yourself time to inspect the wet layer before the lamp, rather than treating cleanup as something to fix after curing.
Frequently asked questions
How close should gel polish go to the cuticle?
Close enough to look intentional, but not so close that gel touches the cuticle or surrounding skin. Leave a narrow, consistent margin. Start the brush slightly below the cuticle, gently guide product upward, and stop before the skin boundary.
Should I use the three-stroke method on every nail?
No. It is an optional control method, especially helpful for beginners or for wider nails. The goal is even coverage with minimal brushing, not forcing every nail into identical strokes. Use the number of passes needed to create a smooth, thin-looking film without flooding the perimeter.
Why does my gel polish flood after I stop brushing?
The brush may be carrying too much product, the coat may be too full, or the finger may be angled so gel moves toward one edge. Wiping one side of the brush, beginning below the cuticle, and holding the nail level while you inspect can help reduce pooling.
Can I cap the free edge with every gel polish?
Only if the product maker’s directions support it. Some systems include free-edge wrapping in their application instructions, while others may not. If it is directed, use a very light sweep with the remaining product rather than adding a thick extra layer.
What should I do if uncured gel touches my skin?
Remove it promptly before curing, using the cleanup directions supplied by the product maker. Do not cure gel that has contacted skin. HEMA-free labeling does not guarantee that a person will not react to a product. Stop use for painful or significant heat, burning, itching, swelling, rash, or other irritation, and seek appropriate professional guidance when needed.
Why is a white or black gel polish harder to apply evenly?
Opaque shades make streaks, thick borders, and sidewall overflow easier to see. They often benefit from a smaller brush load and a more deliberate inspection before cure. Follow the formula’s specific instructions for coat count and curing instead of trying to force full coverage into one heavy layer.